Devils Thumb Pass to King Lake Winter hike
 An epic adventure through Colorado’s finest terrain. Get above 12,000ft (3,600m) and capture the beauty of high alpine with 360 panoramic views from the Devils Thumb pass. Explore pristine colors of Jasper, Devils Thumb and King Lake’s.
Important Information:
- Colorado Avalanche Information Center: If you’re planning any outdoor activities in the backcountry during winter, you must always check the avalanche condition before heading out. Do not take avalanches lightly, most of deaths occurring in the backcountry are caused by avalanches.
- Weather Forecast for South Arapaho Peak: I’ve had a lot of luck with mountain-forecast web site. You can select nearby peaks and explore weather conditions at different altitudes. This is extremely helpful as it can provide comprehensive temperatures, rain/snow and wind speed forecasts.
- Annual Weather Conditions for Colorado Rockies: If you never been to this region, the information on this web site will help you understand what the conditions would be like when you arrive.
- Winter Navigation Skills are Required: During summer, the trail is very visible and easy to follow. During winter, there is no trail and you will have to completely rely on your paper maps or navigation device.
Hike Information:
- Distance: 15mi (24km) Loop
- Elevation Change: 3,500ft (1,100m).
- Estimated Duration: 2 Days (Winter) 8-11Hrs (Summer)
- Interactive Map: Devils Thumb Pass And King Lake Trail
- Directions: Hessie Trailhead

I’ve never been to Colorado, but always wanted to experience the Rockies covered in snow. While poking at different trails, I’ve found an interesting loop that could potentially be doable in winter conditions. After investing a good amount of my time in research and after seeking advice on Colorado 14ers forums – I was finally starting to feel comfortable enough to book a trip and attempt the circuit.
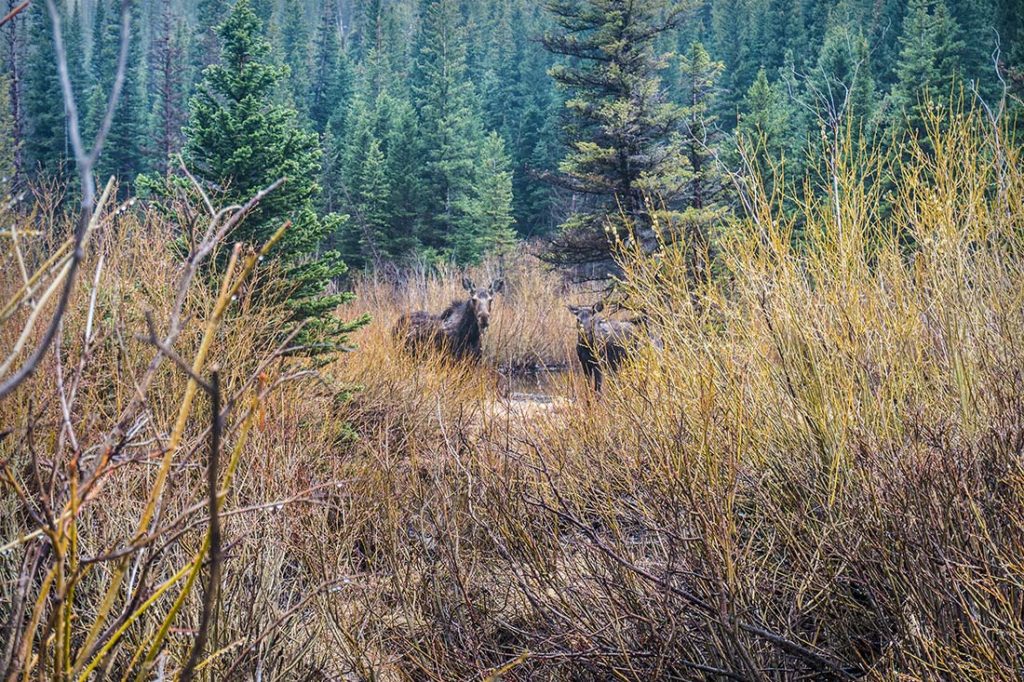
Moma Moose and the Cub!


Parking and Start of the Trail Info
When you arrive at the intersection of Hessie Rd & 4th of July Rd, park your car on the side of the road and head west on Hessie Rd. If you have a high clearance vehicle, you can also drive a little further and park along the road.
After hiking for some time on a curvy service road, the trail will narrow and you will come to a junction by the creek crossing. There was not much snow at lower elevations, so we took the original Devils Thumb Trail instead of Devils Thumb Bypass Trail. I would recommend taking a bypass trail if snow levels are high.


Trail Condition & Terrain Info
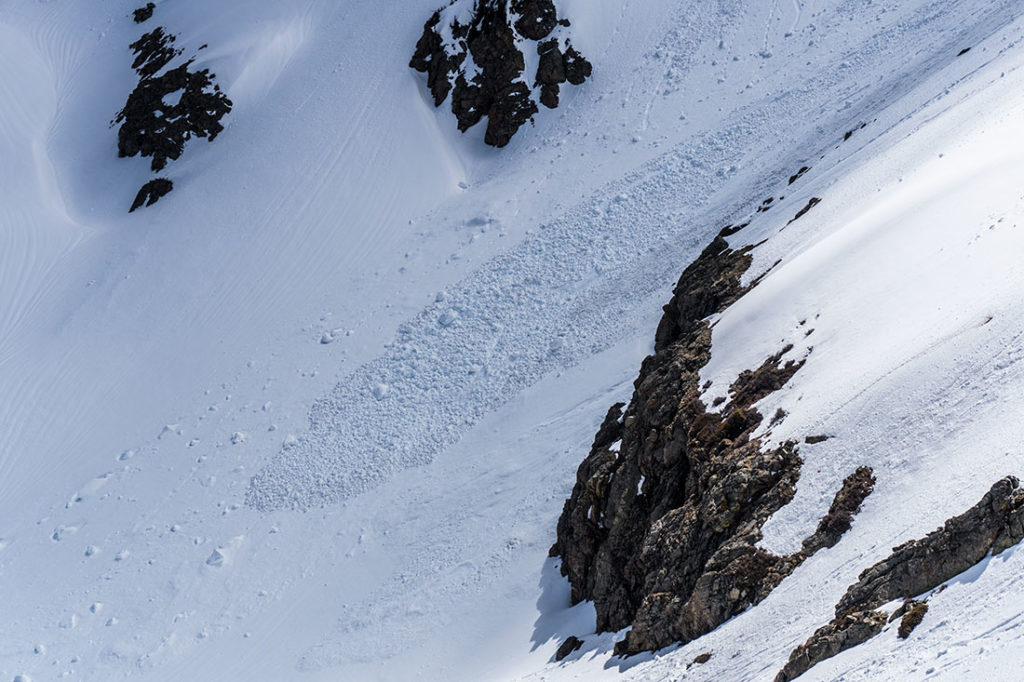
Once you get deeper into the valley, the trail will gradually climb and you’ll find yourself in winter wonderland. You will be hiking not to far from Jasper creek until you start ascending toward Jasper lake. It gets a little complicated in terms of route finding during a short climb toward Jasper lake. There are a lot of trees and if you get off track, watch out for south part of the woods. There are few sudden 10-20 feet drops, that has small cornices on them. You won’t see it until you stand on top of dangerous and unstable snow.
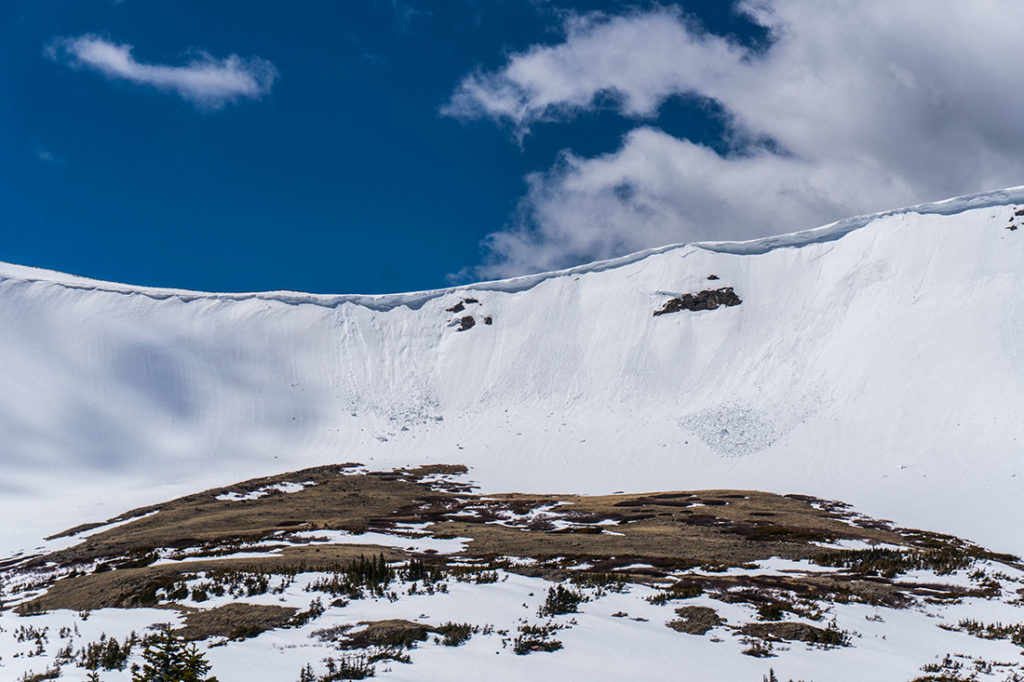


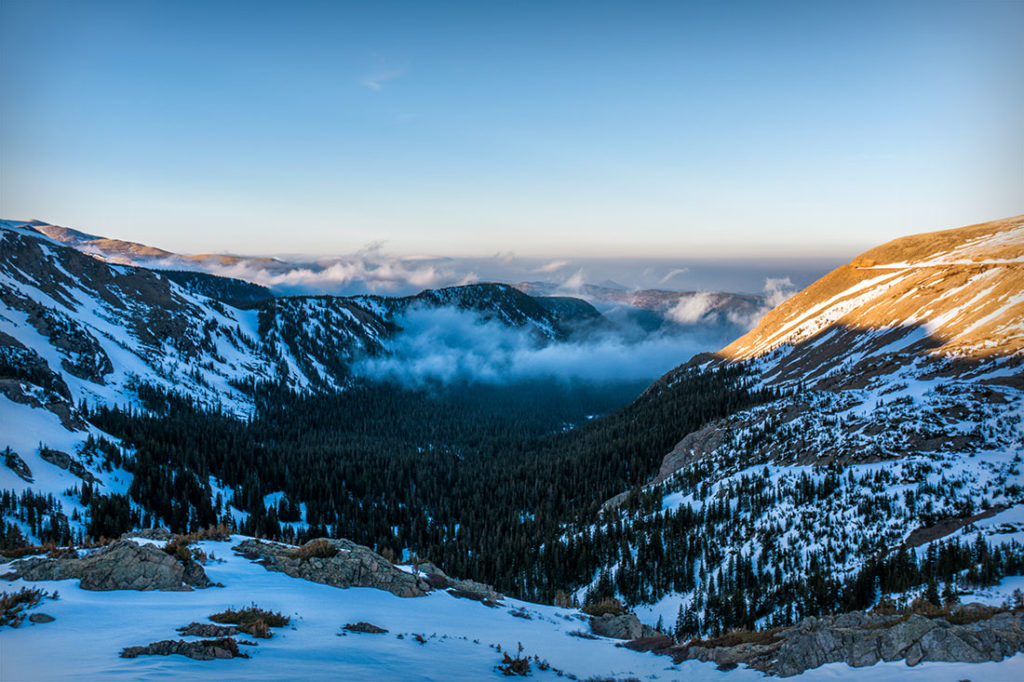
When you start getting closer toward Devils Thumb Lake, the terrain will open up and you will see 360 views of surrounding peaks. It’s a perfect spot to eat lunch or get some warm clothing ready as once you get over the pass, it will get very windy. Once passed the lake, we got a full view of what was ahead of us – a powerful cornices at most of the Western Slopes, including Devils Thumb Pass. I’m from the East Coast and things like snow cornices are very rare. We do get some avalanches in areas like White Mountain’s in NH, but nothing like here in Colorado.


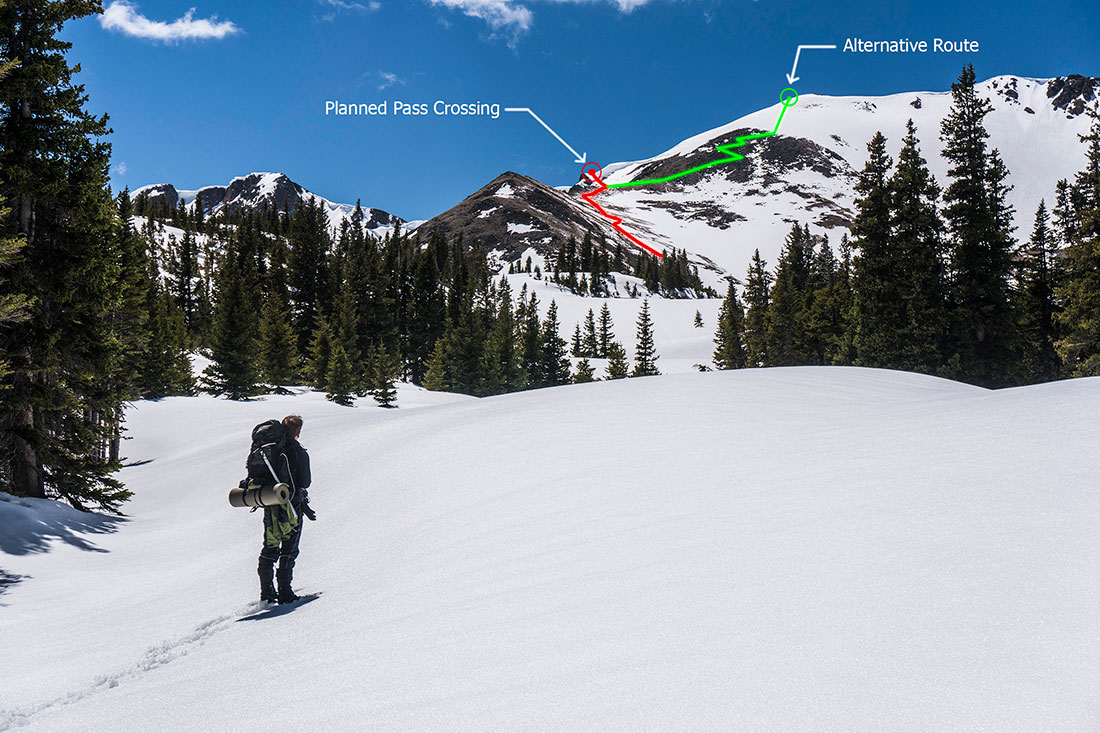
Devils Pass Climb Info
Luckily, the weather was clear and we were able to pin-point a route that would provide us with a safe passage. During my initial research I was warned that I would most likely encounter avalanche conditions and cornices on the westerns slopes. We took it slow walking on top of what looked like a perfectly smooth popcorn ceiling. After a short climb, we were right on top of Continental Divide Trail, with a heavy wind pounding in our faces.


Hiking on top of Continental Divide Trail toward King Lake
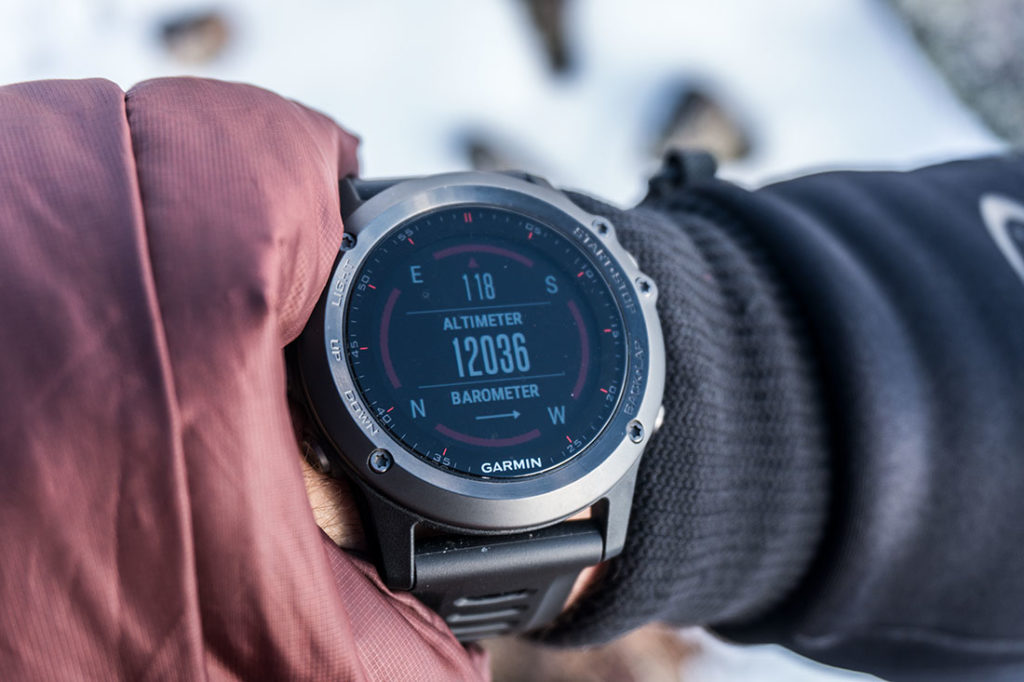
Once you get over the top, you may realize that you are now hiking at over 12,000ft (3,600m) elevation. If you’re local, you may not feel the tiredness or elevation kick right away, but considering that only yesterday we were at sea level elevation, being at over 12,000ft was substantially making things a bit uneasy.
From here it’s pretty straight forward, just hike along the ridge and stay away from cornices that are facing east. Once you reach the end of the ridge, please examine snow conditions and find a safer route to descend down to the lake. We couldn’t see if there was a cornice on the SE side of the slope, so we stayed a little to the SW of the slope in order to safely get down.

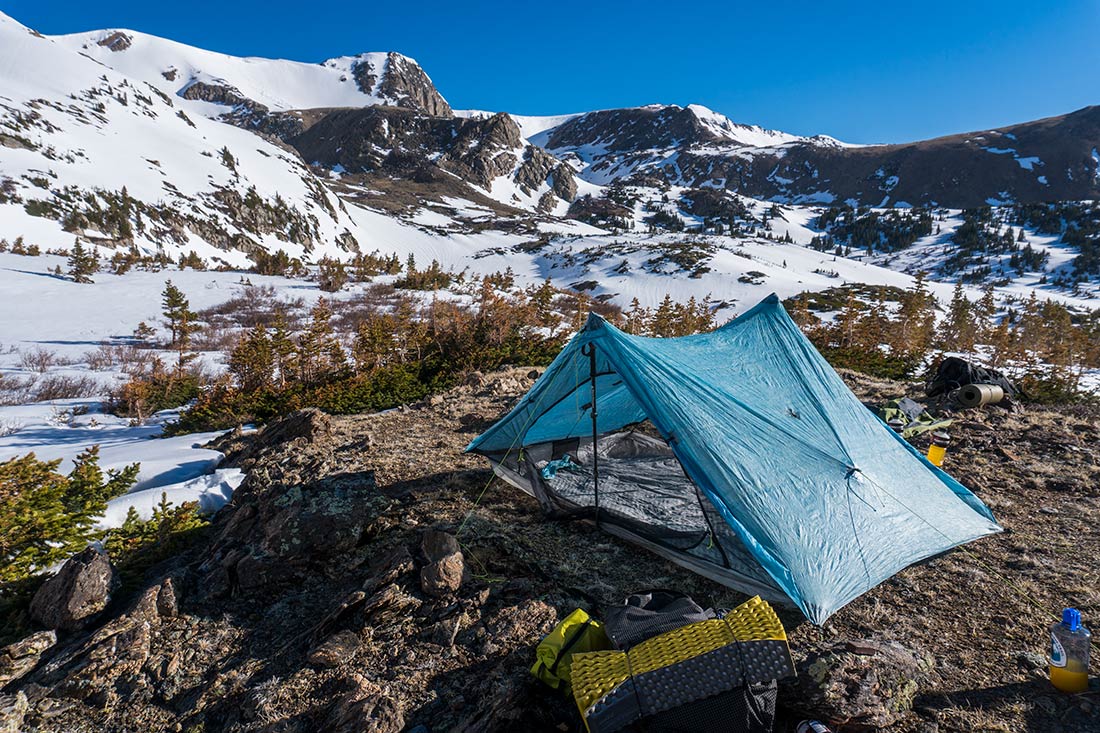


Camp at King Lake
By the time we got to King lake, we were completely exhausted and the sun was setting down. It was an approximately a 10 mile day for us, potholing in snowshoes and feeling the effect of high altitude. However, we did find a nice camp site on the NE side of the lake. There was no water, as everything around us was frozen and we ended up melting snow. Once we got done with eating dinner, we enjoyed the sunset and then were off to sleep.
In the morning, we woke up a little to late, not feeling hungry and still tired. We packed up our bags and rushed down the valley before snow become soft. It was easy and beautiful hike back down to the car.


