Backpacking Guide for Tour du Mont Blanc
 This is a detailed, visual blog for planning Tour du Mont Blanc Trek. Below you’ll find the answers to most common questions people ask when planning their trip. Please feel free to reach out and ask any additional questions in the comments section below.
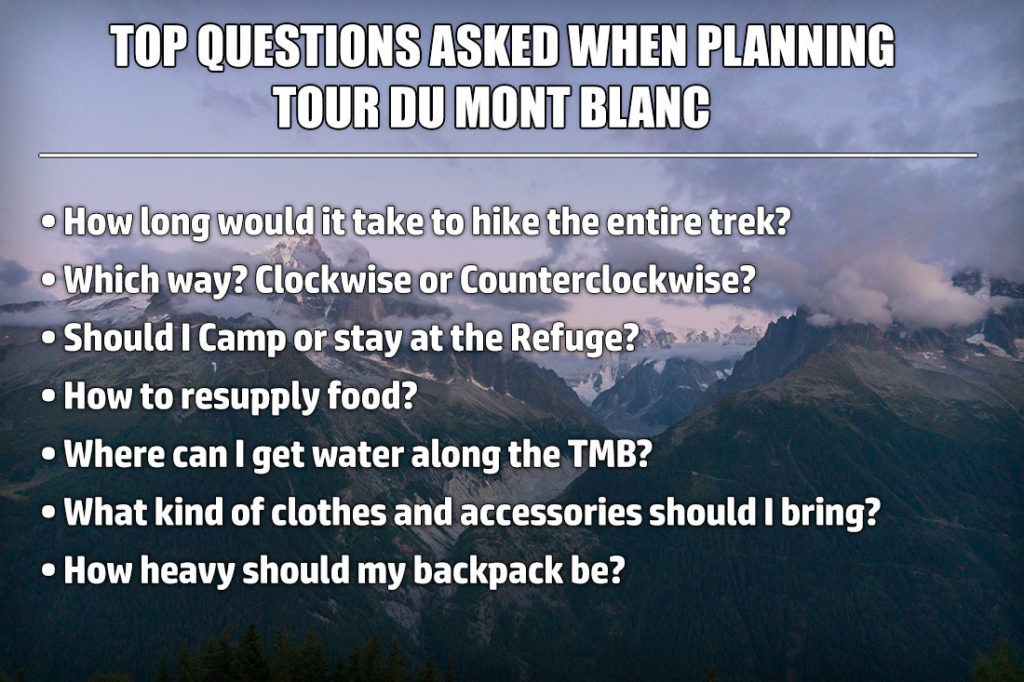
Top Questions Asked:
- ☑ How long would it take to hike the entire trek?
- ☑ Which way? Clockwise or Counterclockwise?
- ☑ Should I camp or stay at the Refuge?
- ☑ How to resupply food?
- ☑ Where can I get water along TMB?
- ☑ What kind of clothes and accessories should I bring?
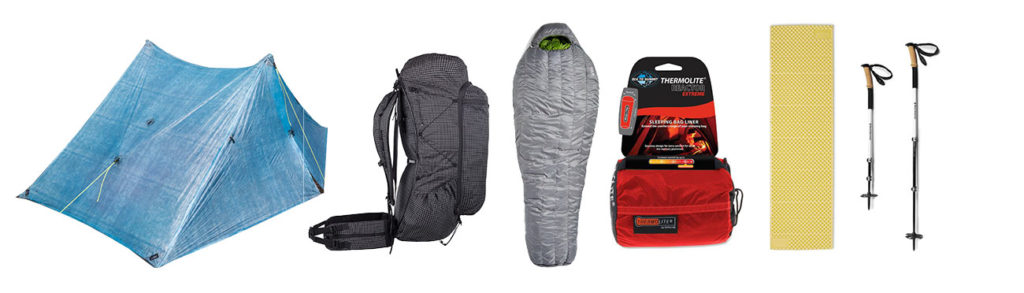
- ☑ How heavy should my backpack be?
Hike Information:
- Distance: 170 km (110 mi) circuit
- Elevation Change: 10,600m (35,000ft).
- Estimated Duration: 6-14 days
- Interactive Map: TMB Circuit Map
- Directions: Driving Direction to Trailhead & Parking Location
Interactive Map Featuring Most of The Rifugios and Alternative Routes
❖ DAY 1: From Milan Airport to Courmayeur And Hike to Refugio Bonatti | 13.5km (8.4mi)
We flew from New York (JFK) and arrived to Milan (MPX) at 8:15AM. At the airport, we picked up our rental and drove to a grocery store. After buying food for the next two days, we drove straight to our Trailhead Parking in Courmayeur and started our hike around 3:00PM. (Please note, car rental option is not the cheapest method of getting to TMB. We opted for it because we were very short on time and we needed all the flexibility we could get. Please refer to “How do I get to TMB and where do I start?” blog for transportation details)

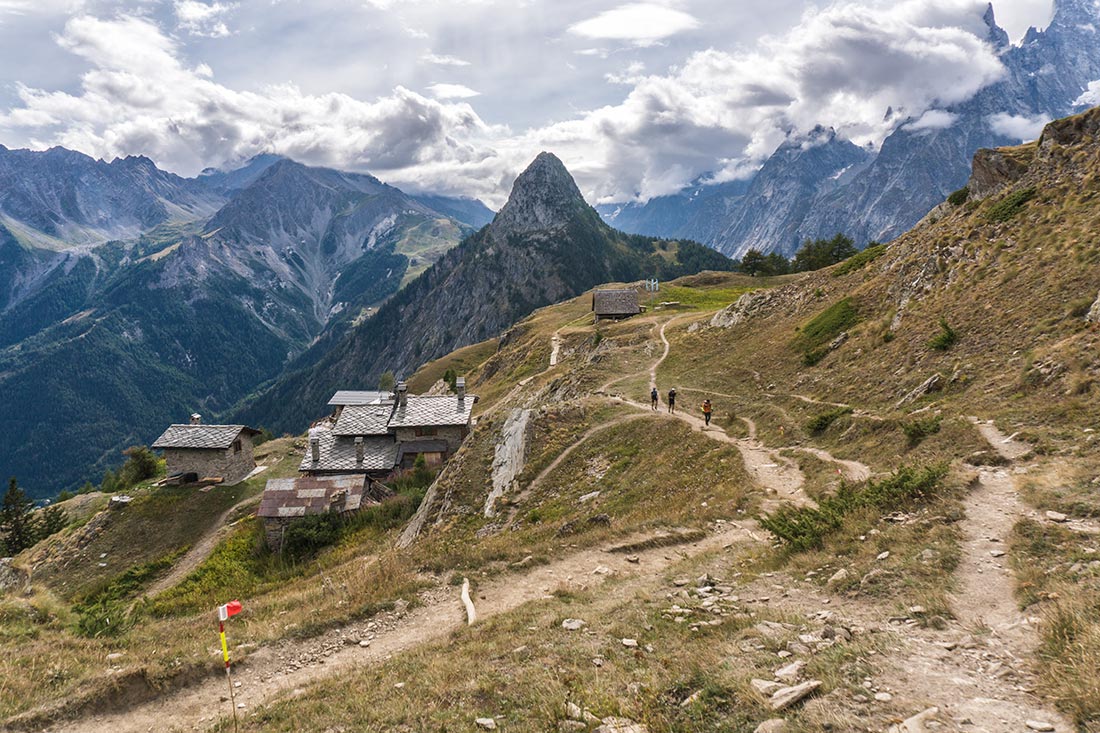


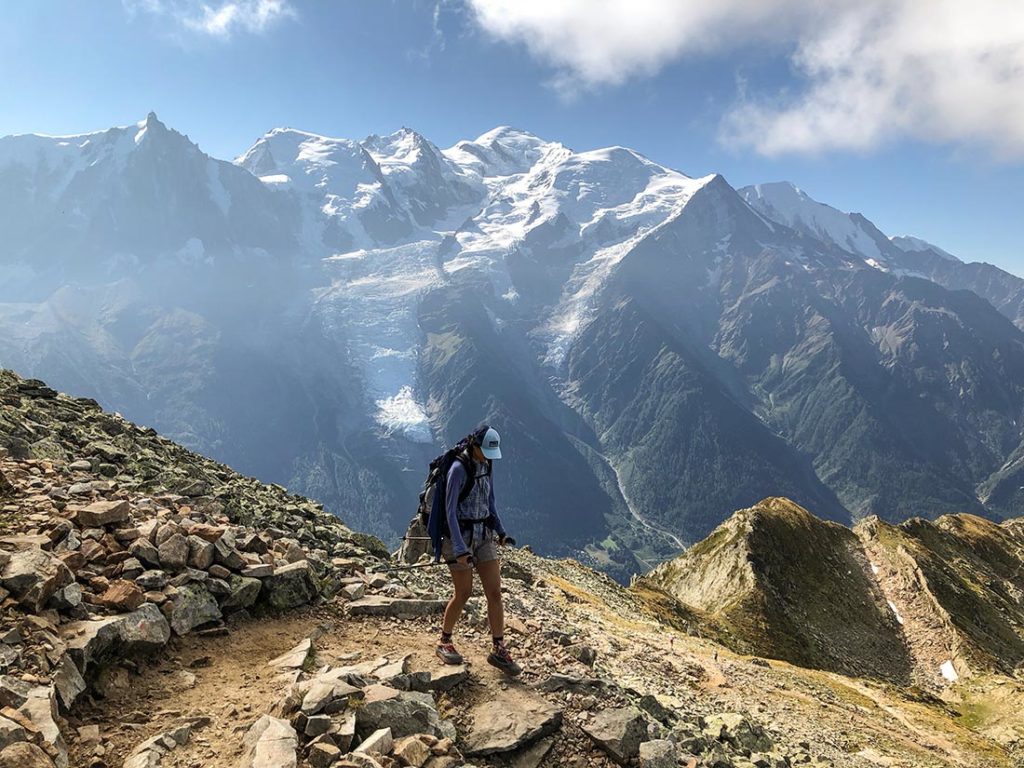
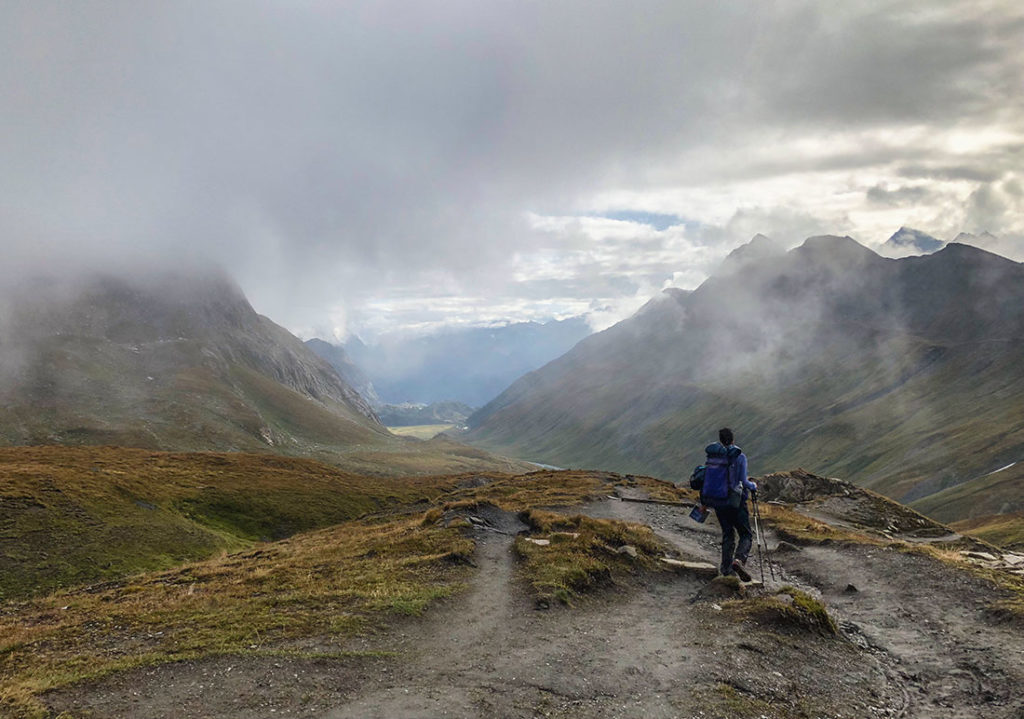
At 3:00PM, we left the car at the trailhead and started our ascend toward Rifugio Giorgio Bertone. It’s a 640 meters (2100ft) uphill climb. We stopped by Rifugio to fill up enough water until Rifugio Bonatti in about 8km (5mi). The trail wraps around the mountain on the NW side and is pretty straightforward all the way until you reach the next Refugio. ]


We reached the Rifugio Bonatti around 7:00PM and they were fully booked. Once we filled up enough water, we hiked on for another 1.5km (0.9mi) until we found a nice camping spot slightly over the trail 45°51’17.3″N 7°02’21.7″E overlooking the valley and Di Freboudze Glacier. We set up out tent and enjoyed beautiful sunset over the Aosta valley. ]
❖ DAY 2: Hike From Refugio Bonatti to Champex | 31km (19mi)


We woke up around 6:15AM and were on the trail by 7:00AM. The whole beauty of waking up early and getting a head start, is that you don’t get to see other hikers for at least an hour or so. By 9:00AM we reached the Rifugio Elena, which was a perfect spot to eat our packed breakfast.


The climb from Rifugio Elena to Grand Col Ferret is a grueling 500m (1,640ft) stretched over short 2.3km (1.4mi) distance. Take it slow and don’t burn yourself out so you have enough energy for the rest of the day. Once at the pass, the border views between Italy and Switzerland are simply breathtaking! When you reach the next Rifugio, you can order breakfast or lunch, their food looked pretty delicious. From here you have an option to either Road walk or take a higher route. ]


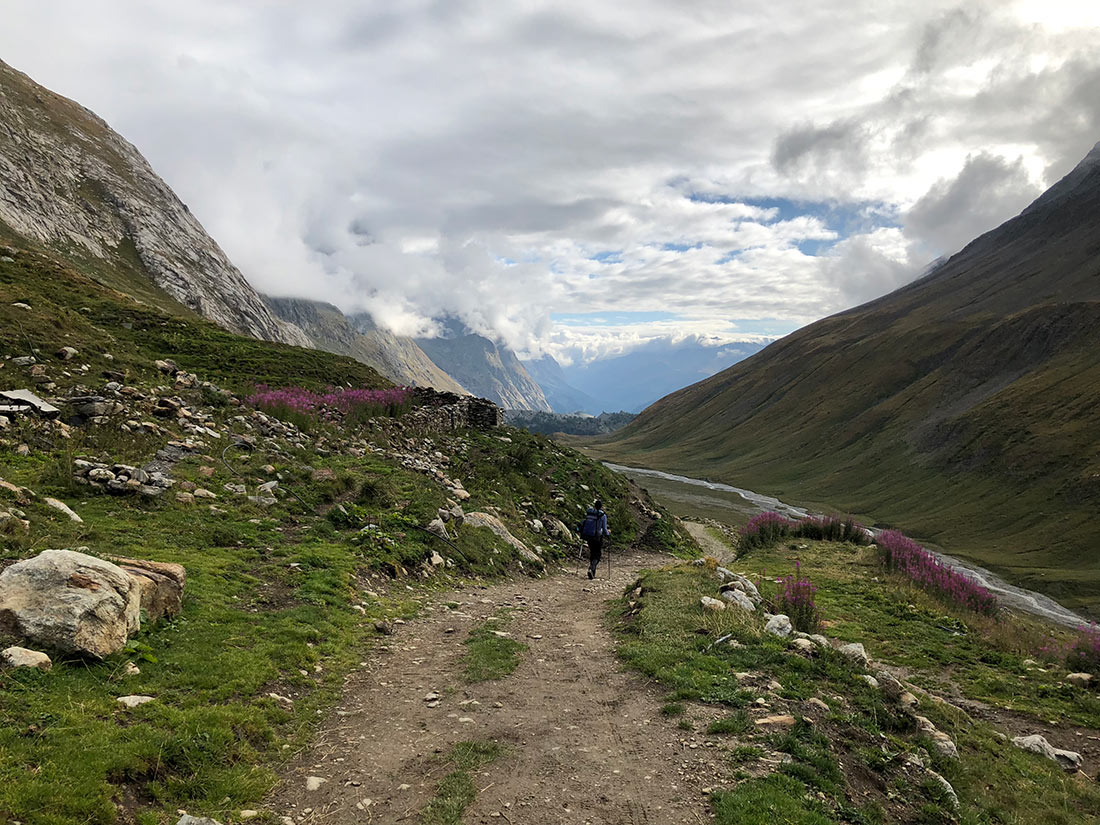
We opted out for a higher route and reached the town of La Fouly by 2:00PM. Once passed the town, you will cross the Dranse de Ferret river and will hike along for approximately 8km (5mi) until you reach the town of Praz de Fort. From here we hiked on for another 3km (1.8mi). Passing by the town of Issert and until we reached a beautiful campground by the spring overlooking the valley: 46°00’48.4″N 7°07’08.1″E ]
❖ DAY 3: Hike From Champex Lac to Refugio Les Grands | 18km (11mi)


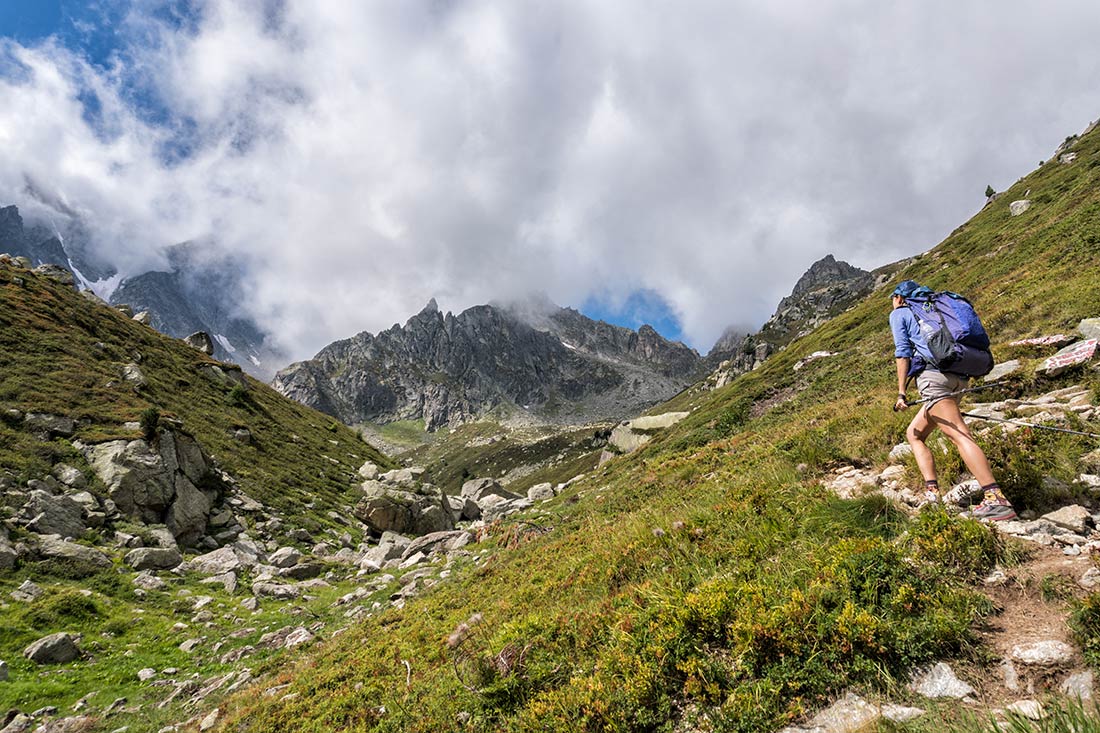

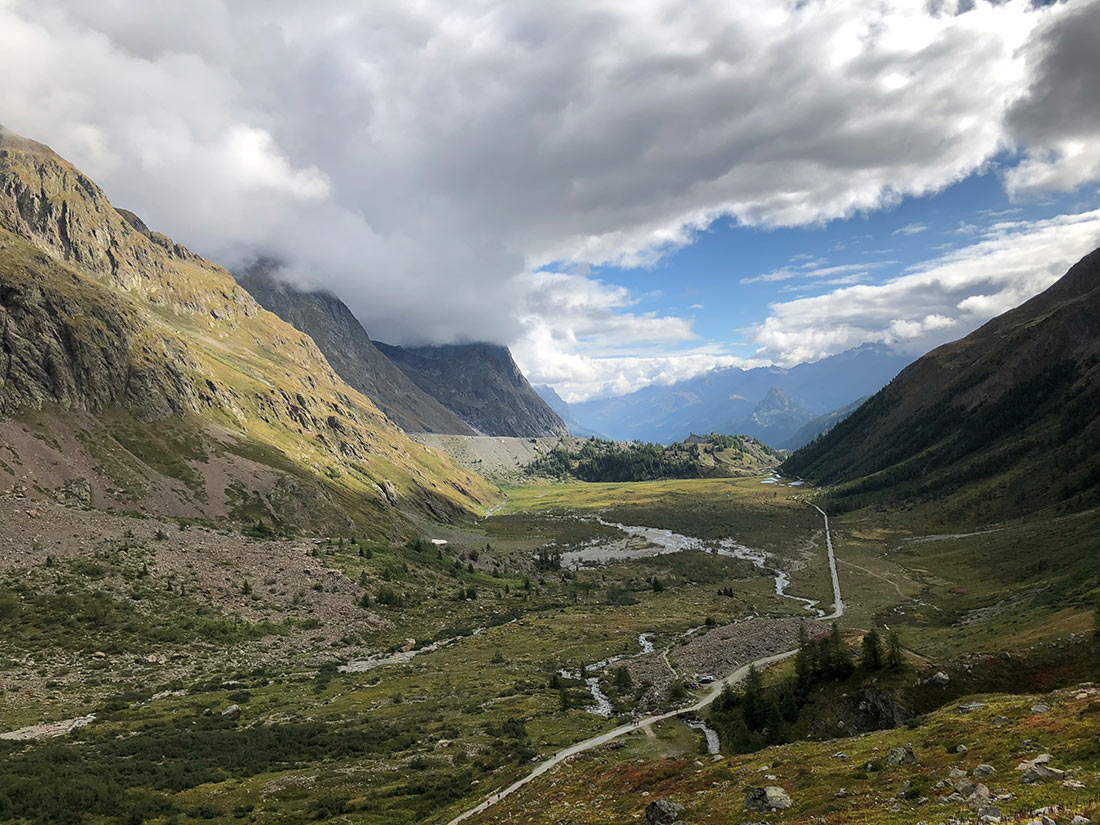
In the morning we reached the town of Champex around 8:00AM. While waiting for the supermarket to open, we grabbed a breakfast at the bakery that had a high-speed internet and a free wifi. Soon after we were back on the trail following the alternative variant “Variante de la Fenêtre d’Arpette” – which is marked Orange on the interactive map after Campex-Lax. It’s a steep, gradual climb, that gets even steeper during final 400 meters before “Fenetre d’Arpette” pass crossing. You will have to scramble over large boulders and follow TMB red & white markers. For this small part, use your best judgement. ]
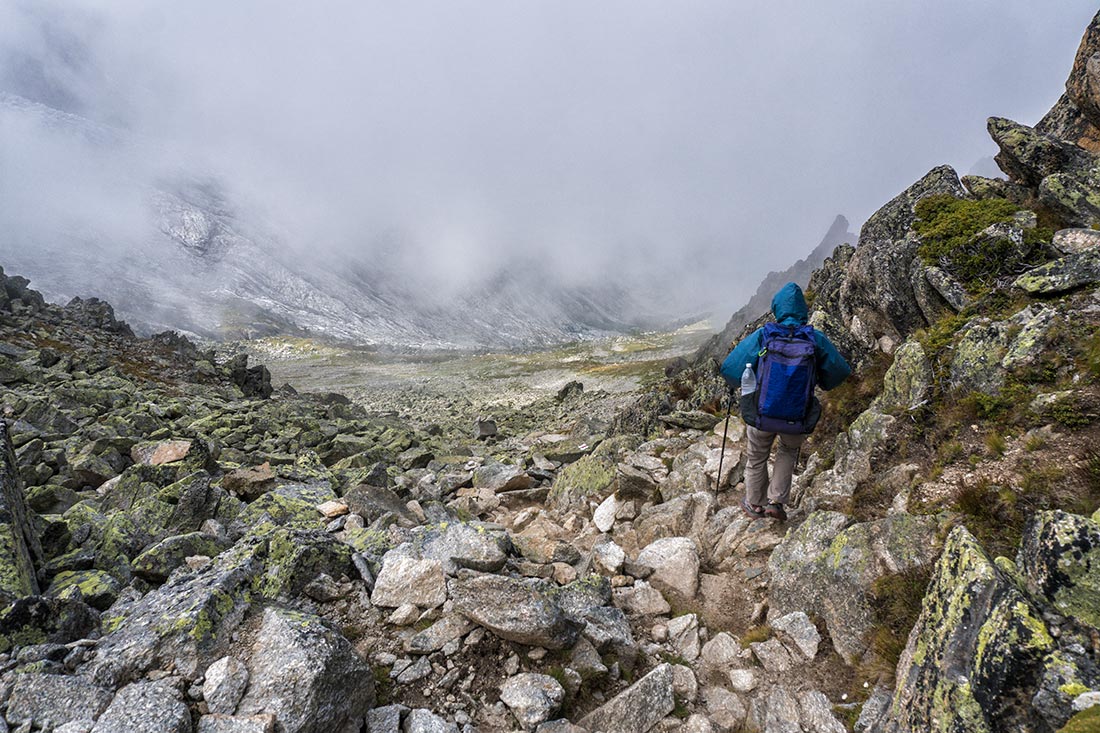


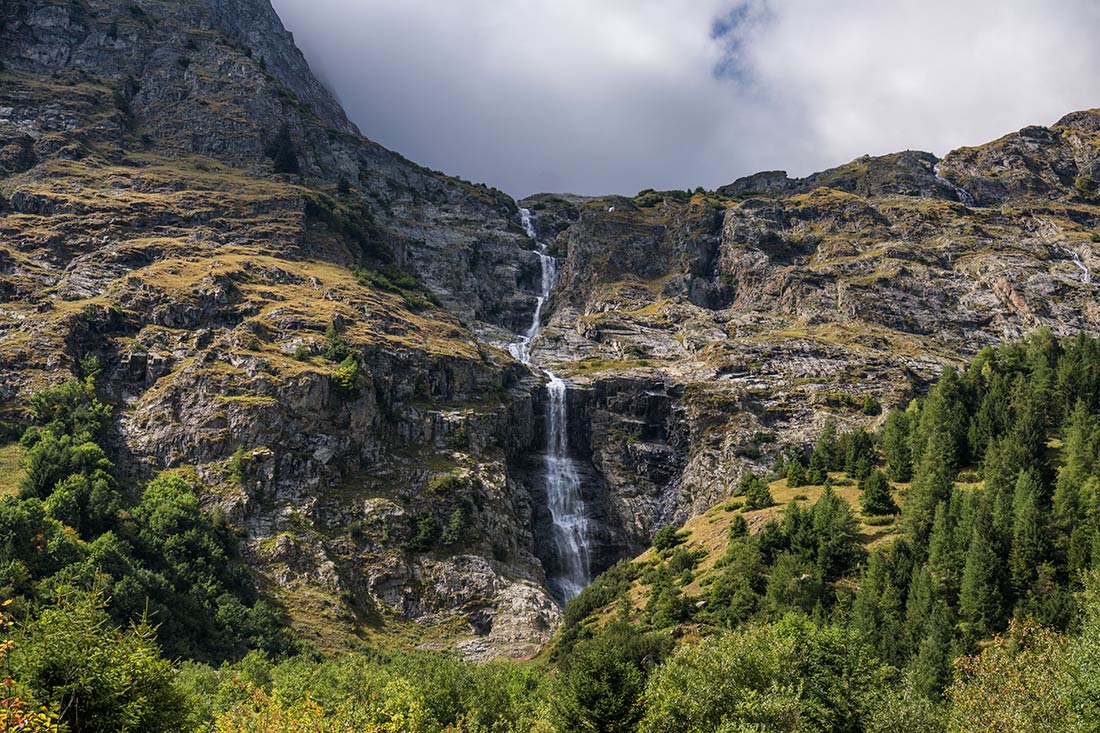
Once over the pass, the views are simply unbelievable! As you descend down the trail, you’ll see a clear sight of De Trient glacier and giant peaks towering above 3,500 meters (11,500ft). We noticed a huge storm system moving from the west. It didn’t take to long until it started to rain as we descended down into the valley. When we reached Buvette do Glacier du Trient the hut was completely closed and there was no faucets with running water. Luckily, we had enough water with us. (Please note: You can get water from Trient Glacial Melt river, but you may want the water sit in the bottle, and have the sediment drop to the bottom and then carefully poor the top layer into a volume. I would highly recommend filtering with water filtration system similar to Sawyer Squeeze or boil it. The stream’s water looked milky, so most likely it has silt in it (a very fine grinned rock). ]


From Buvette do Glacier du Trient we are taking the next variant “Variante des Grands“. Once you cross the river, make a left and follow the the trail through a series of switchbacks for a little over 700 meters (2,300ft) until you reach “Refuge Les Grands“. Luckily, the rain stopped. After filling up some water, we hiked on for another 0.4km until we noticed a single camp spot, hidden nicely between spruce trees, overlooking 270 degree views of the entire valley and surrounding glaciers. 46°01’34.4″N 7°00’25.3″E ]
❖ DAY 4: Hike From Refugio Les Grands to Refugio La Flegere | 21km (13mi)


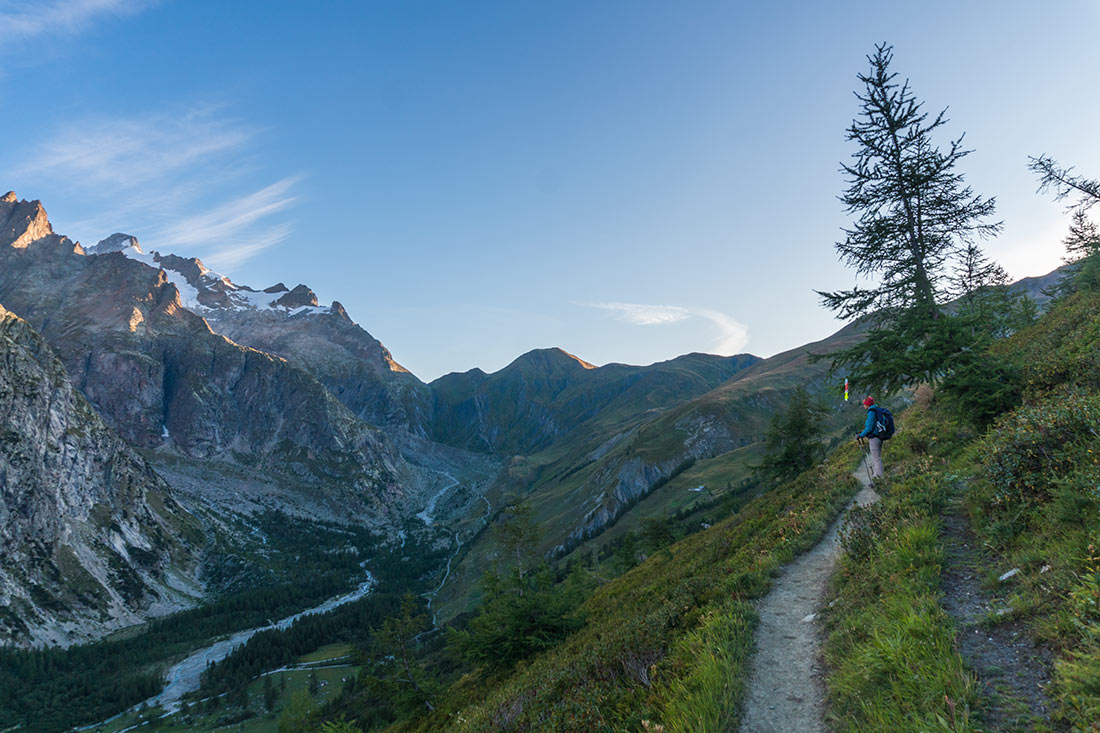
We woke up to crystal clear morning, packed up our tent and started heading toward “Col de Balme Pass”. On clear, non-windy day, it’s a beautiful spot to have lunch or breakfast. From here, we’ll rejoin the original TMB and cross into France! When you descend down from des Posettes Peak, you can grab some delicious food from Auberge La Boerne that is conveniently located near the trailhead. Once you cross the Des Montets Road you will have a tough, over 800 meter (2,600ft) climb ahead of you. Along the way, there will be a slightly intimidating section with vertical ladders that you would have to climb. Make sure to take your time and stay safe.


When you reach the top, you will slowly begin the descend until reaching Refugio La Flagere. Depending on the season (August/September) watch for wild blueberries, they are all over the place. They are full of antioxidants and extremely delicious! Refugio La Flagere was completely booked, but we were able to eat dinner inside and request to have the lunch packed for next day. There is also free camping 150 meters down from Refugio near man made water reservoir. 45.961076, 6.888344
❖ DAY 5: Hike From Refugio La Flegere to Refugio du Fioux | 27km (17mi)


Today’s hike is pretty gradual with most of the elevation gained toward the end of the day. We will pass by the town of Les Houches and pick up additional groceries. This is a very large town that has supermarkets, restaurants and outdoor stores.

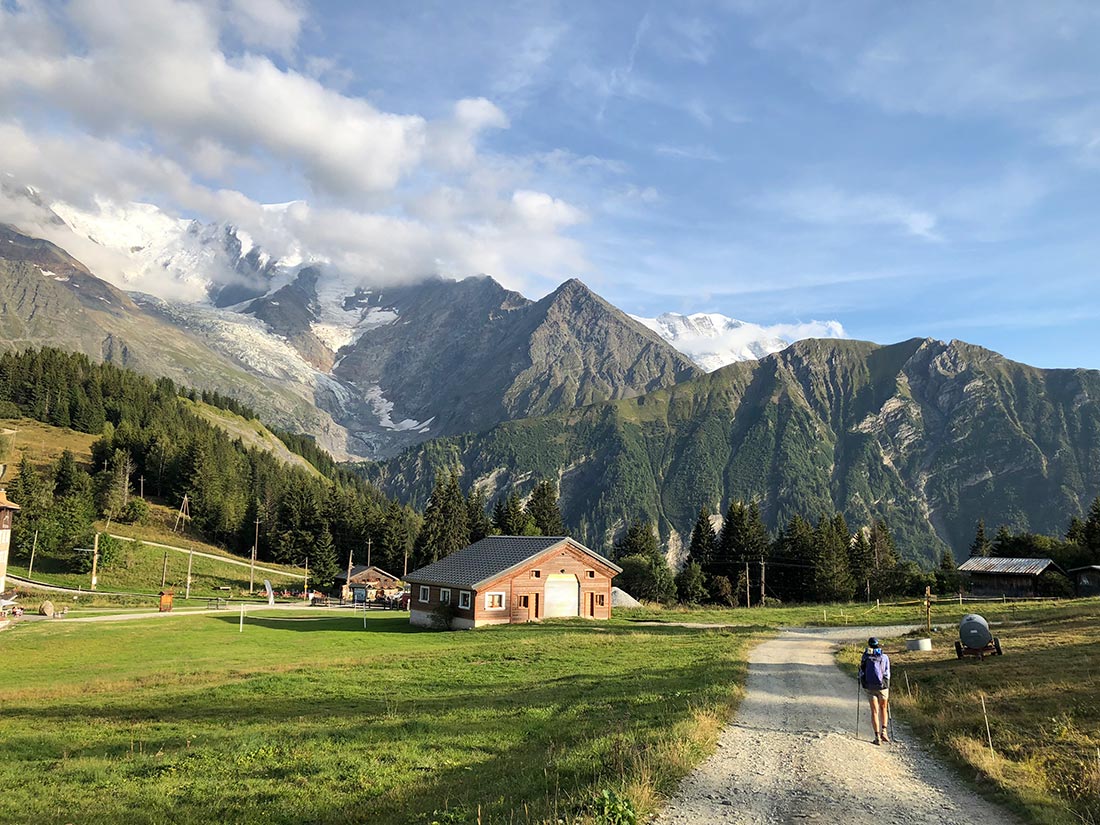


Once out of Les Hoches, you will begin your climb through paved switchback road that will eventually turn into a dirt road leading up all the way to the top of the Cold de Voza Pass. On the other side, you’ll continue along the dirt road until you reach Refugio du Fioux. We made a mistake for not camping at this place, and ended up hiking for another 3km (1.8mi) until we found a camp spot near the Electric Lines. 45.861805, 6.744513
❖ DAY 6: Hike From Refugio du Fioux to Refugio des Mottets | 28km (18mi)


We woke up to clouds hanging low above us. Based on recent weather forecast, we are due for some heavy rain starting before noon and ending the next morning. During the first 10km (6mi) of our trek, the trail runs through the middle of Les Contamines-Montjoie Valley. Most of the hike is on multiple roads and some mixed trails. We did find it to be very interesting as we got to experience some of the local culture and amazing, wooden architecture.


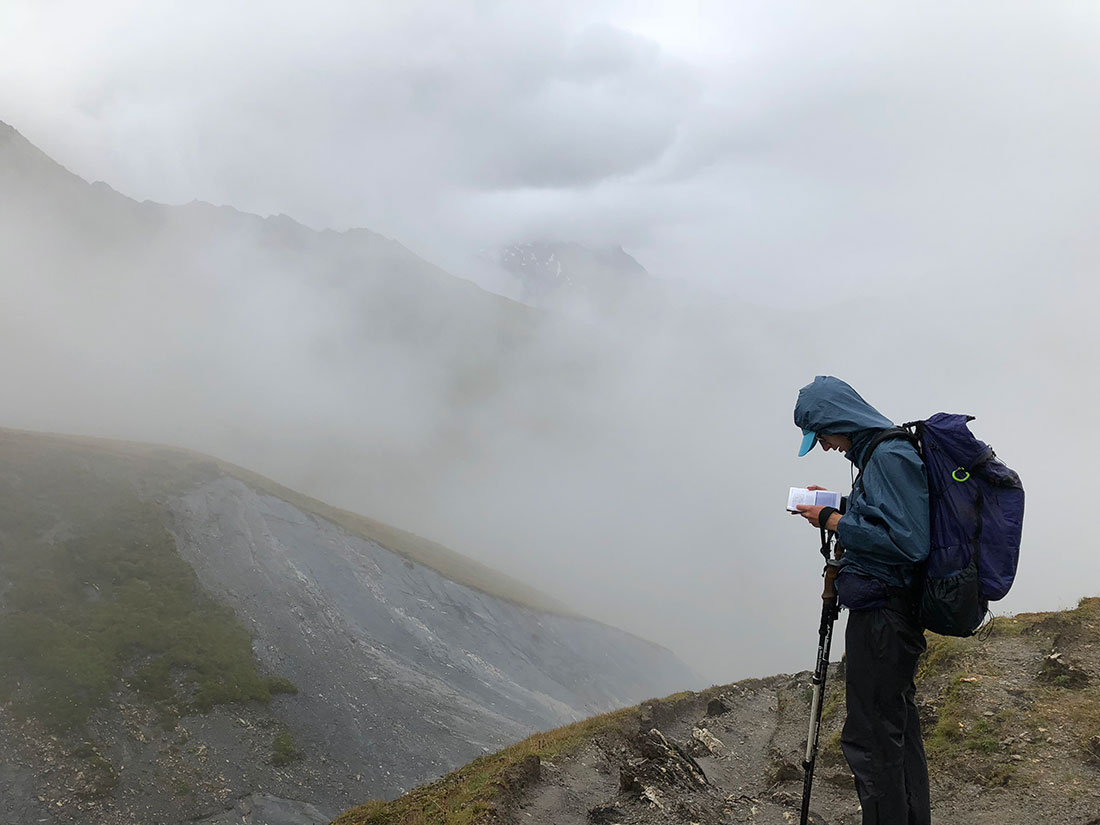


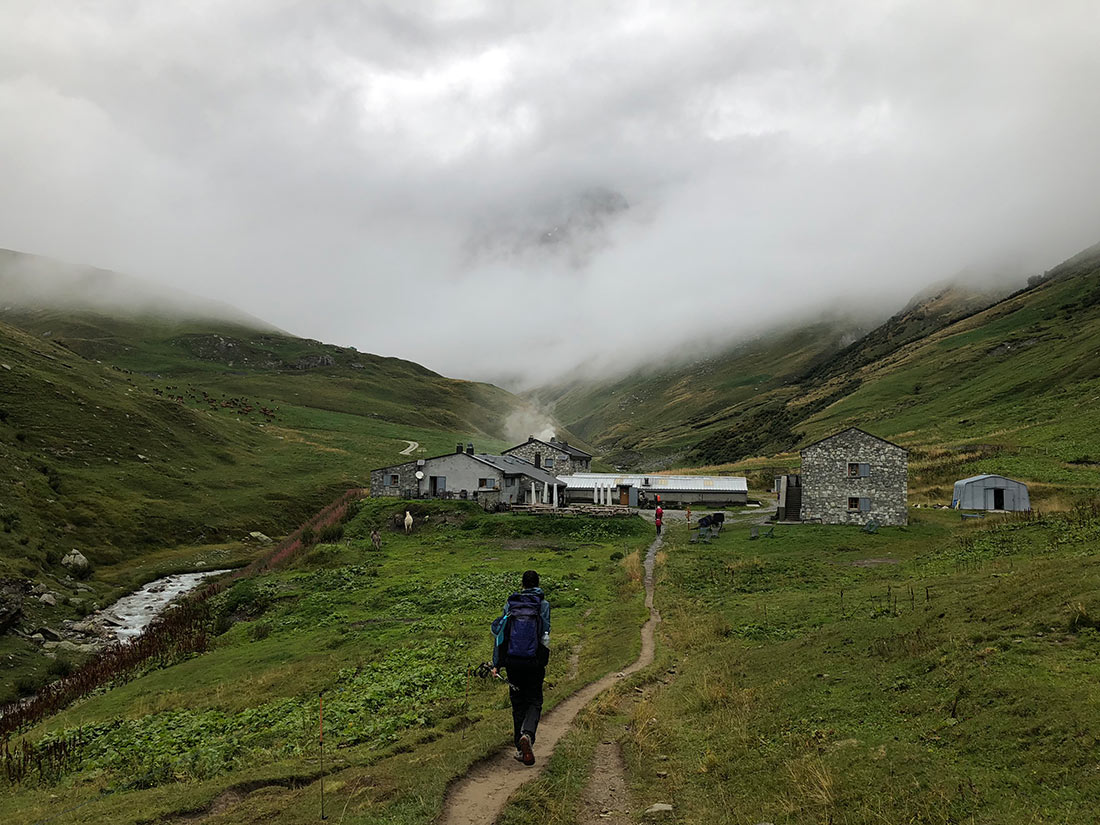

Around noon, the wind picked up. Low hanging clouds descended from above and filled the valleys with chilling moisture. Very soon it started to downpour. Despite bad weather, the hike felt quiet enjoyable. Occasional views with low clouds hanging in the valleys made it look very special. At about 18km (11mi) into our day, we reached a junction to Variante du Col des Fours, which is a beautiful high route, leading toward Refugio des Mottets where we wanted to dry up and stay for the night. However, the hut was fully booked, but they do have a free camping, which is 5min walk from Refugio
45.736280, 6.780248. We were also able to eat delicious 5 course dinner with a friendly atmosphere and enjoy live, wind-up music box playing many well know national and international songs.
❖ DAY 7: Hike From Refugio des Mottets to Courmayeur Trailhead Parking | 27km (17.6mi)


In the morning the rain has stopped. It was pretty cold and we had a large climb ahead of us 620m (2,000ft), which is nice because it gives you a chance to warm up. As we reached Col de la Seigne Pass, we couldn’t see much and therefore quickly continued down the valley. It cleared up eventually once we got down to the valley. Now we were headed for our final ascend before reaching Courmayeur.


When you reach Refugio Combal, the road continue down into the valley where there is a bus that can take down to Courmayeur. Even though we were very tired, we did not want to skip any single part of the trail and regret not catching that view. This is the last climb of over 460m (1,500ft) which opens up to a beautiful view of Glacier del Miage. Early in the afternoon we’ve reached Refugio Restaurante Maison Vieille, we we grabbed some lunch. Food was “Ok”. From here, it’s a final descend down into the Courmayeur for over 850m (2,800ft).


 I must admit, just the drive itself, from the town of Independence to Kearsarge Pass was simply mind blowing! We would stop every few minutes just to simply inhale the constantly changing view! We’ve arrived to


 Tour du Mont Blanc is certainly an adventure of a lifetime. I believe it’s very important to make sure that you get the most out of your time and experience while you’re hiking this trail. That’s why we wanted to make a blog where everyone would be able to find all the necessary information for their upcoming journeys.
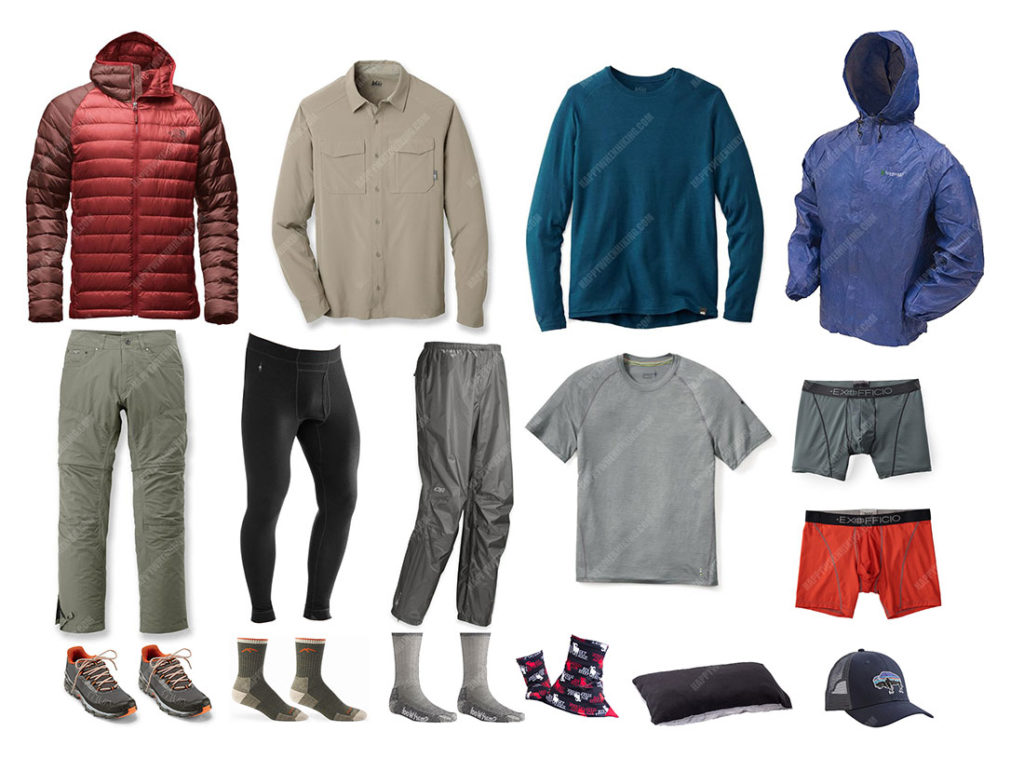


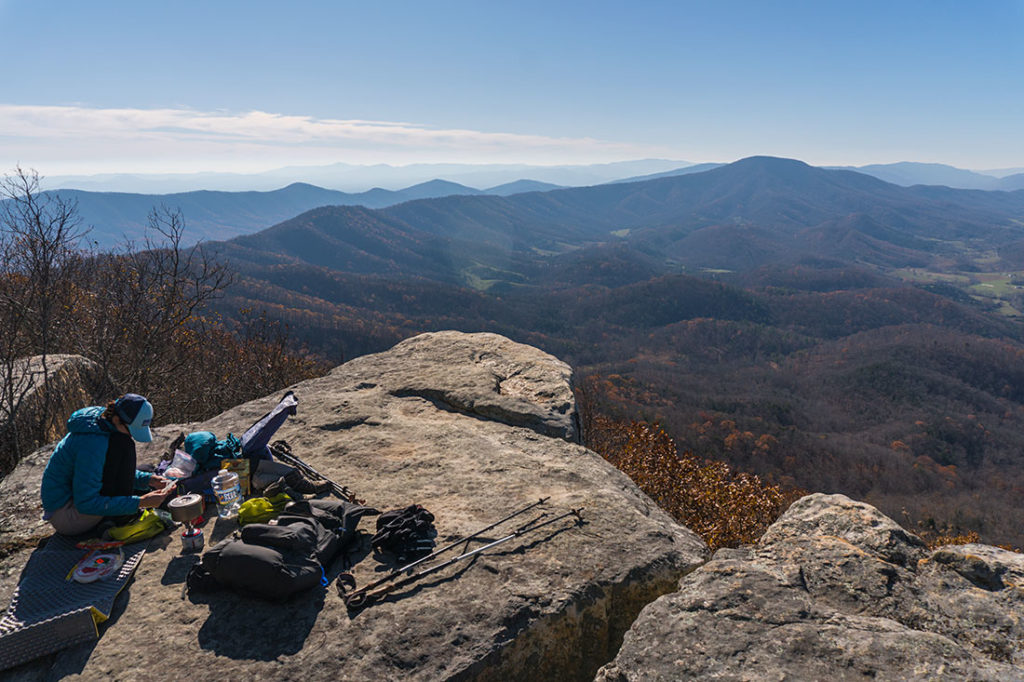


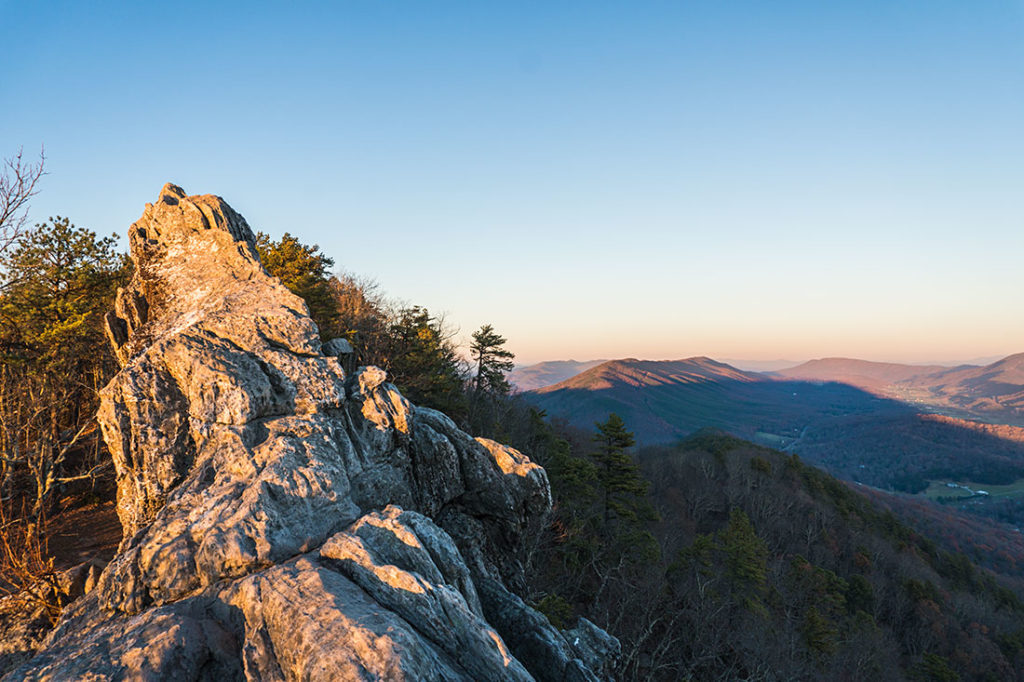


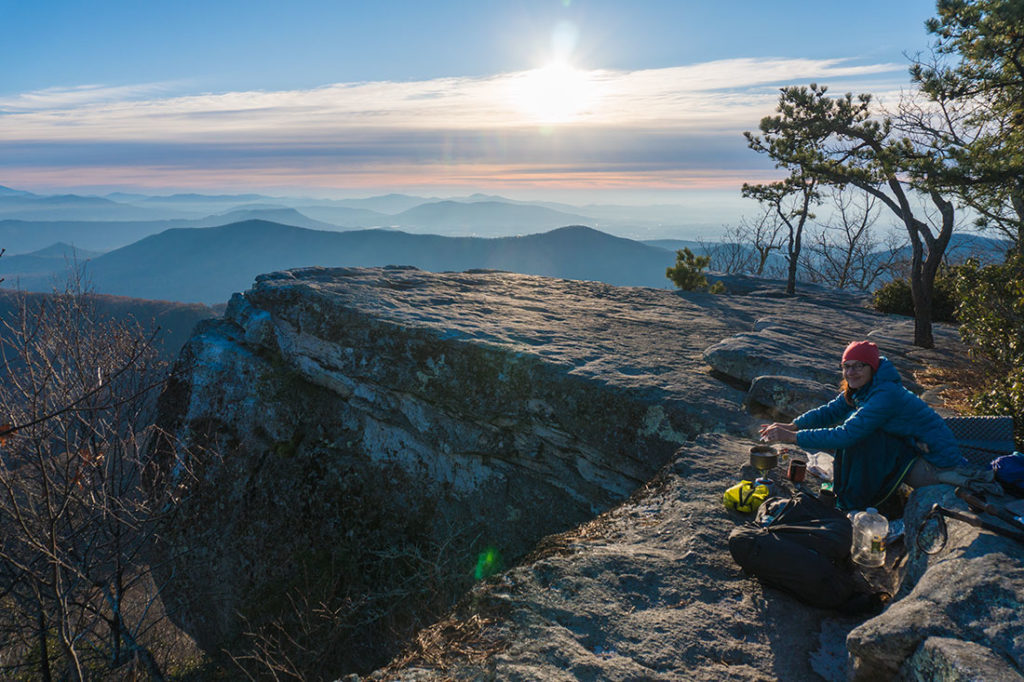 This is a must do hike for anyone visiting West Virginia Mountains. McAfee Knob is considered to be be one of the most scenic points along the entire Appalachian Trail. A rounded cliff standing tall at 3,197ft (975m) offers panoramic views of the Catawba Valley 1600 feet below.
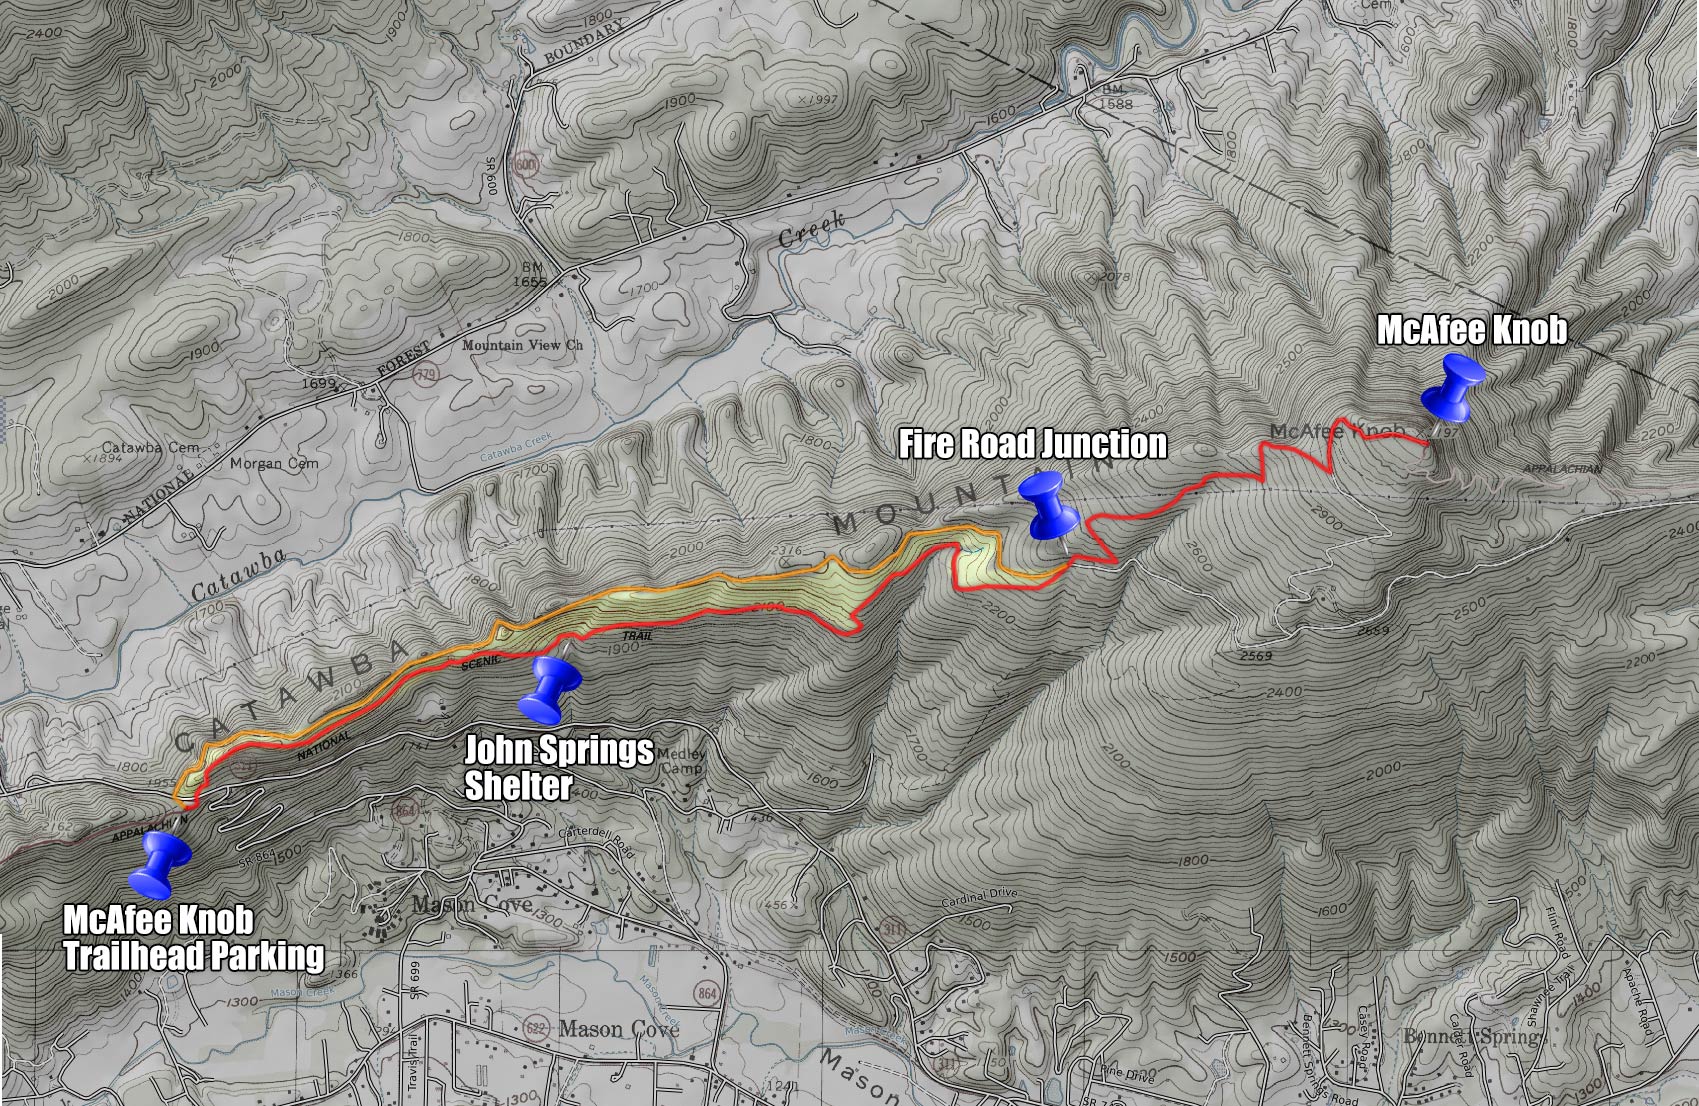


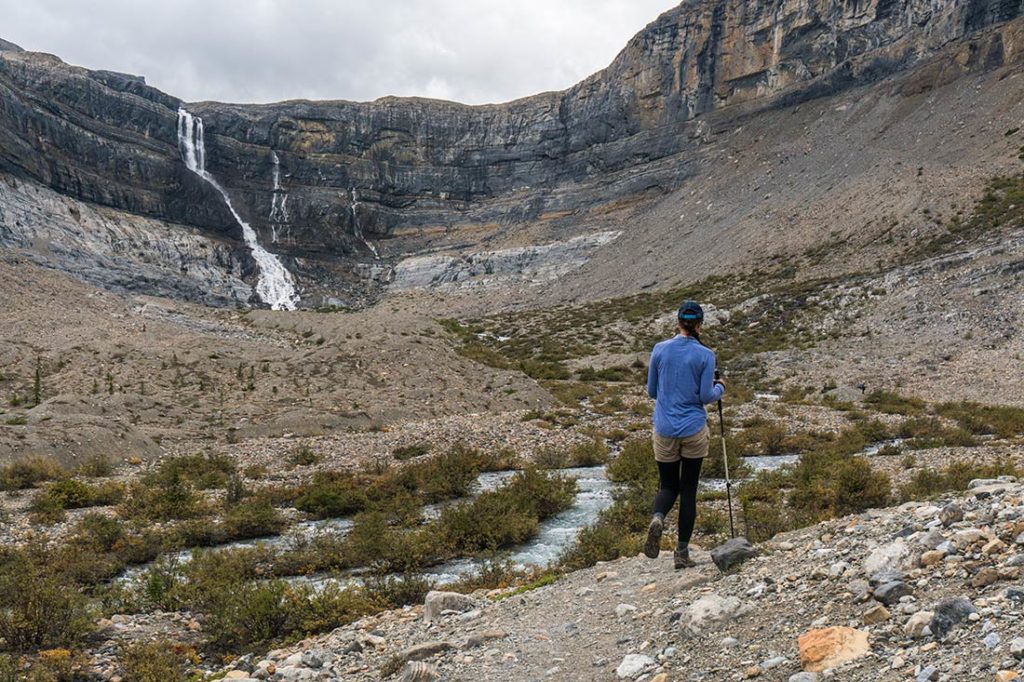
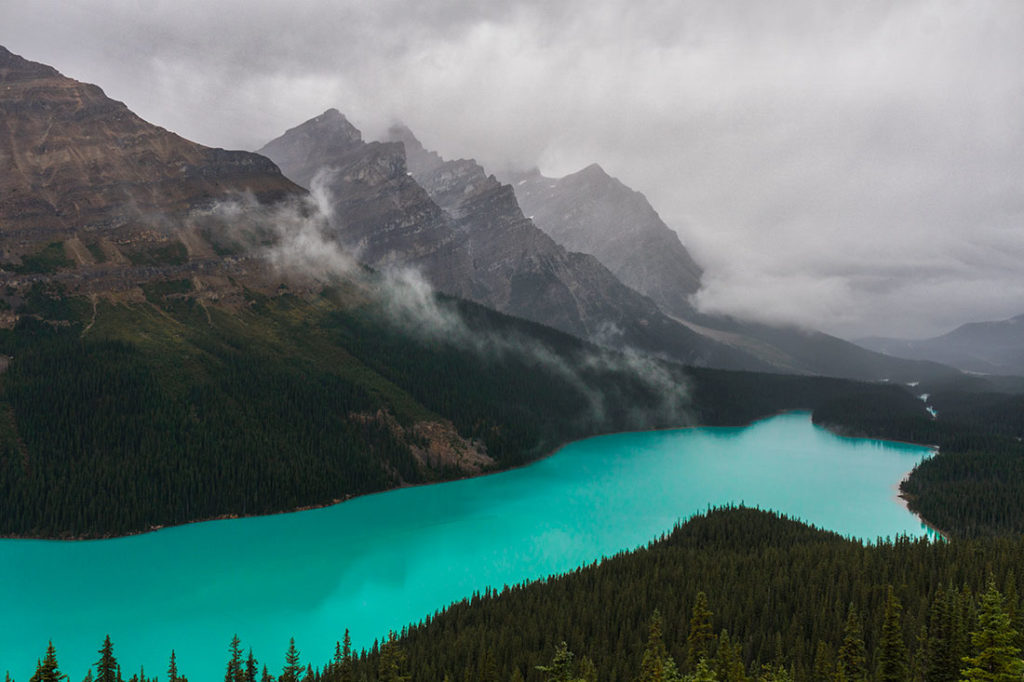
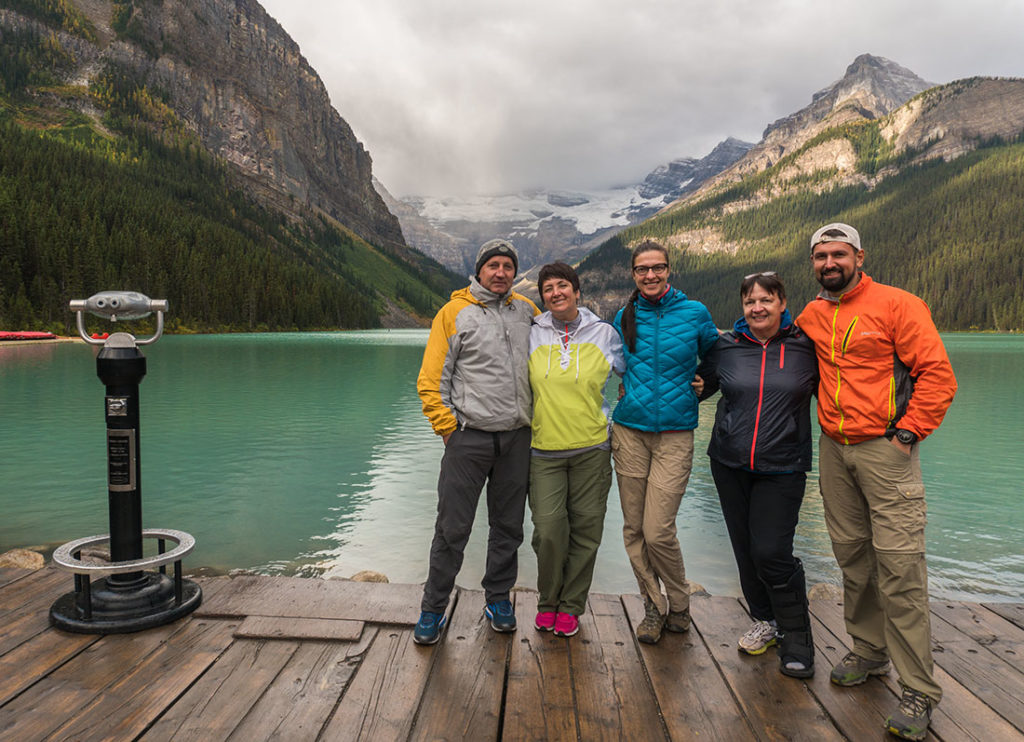 Ever since we laid our eyes on Canadian Rockies, it’s been a long time aspiration to show our parents the beauty of these mountains. While Dasha’s mom is always up for an adventure, I’ve tried nearly everything to break the all-inclusive resort vacation habit of my parents. I even came up with detailed, day-by-day itineraries for them to explore the mountains. Yet, they were afraid to leave their comfort zone and always resorted back to booking their all-inclusive vacation in Mexico or Dominican.
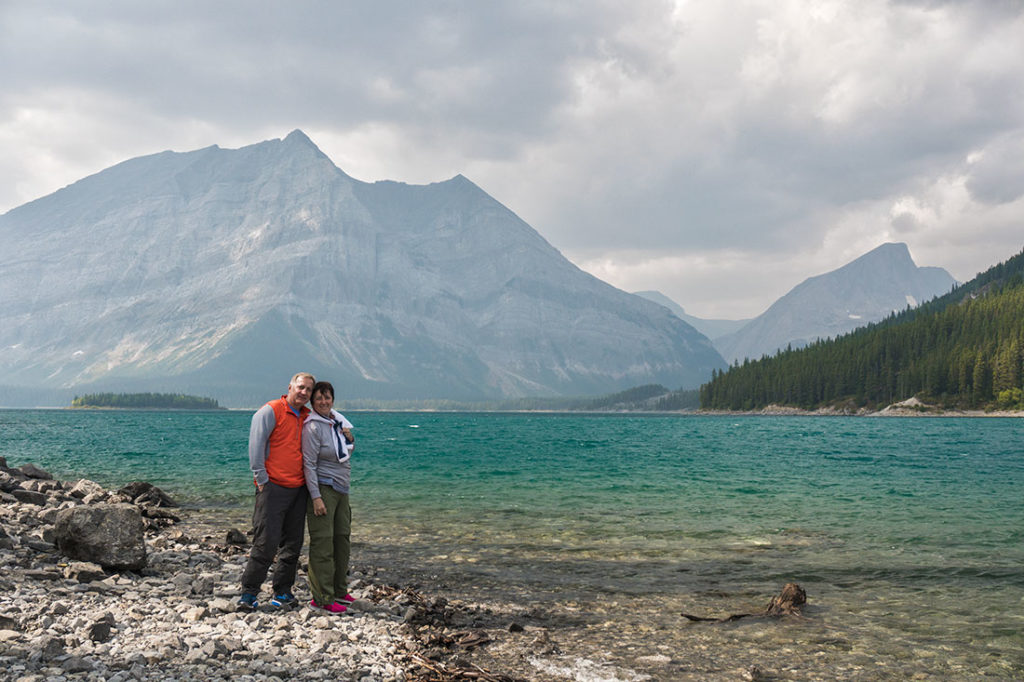

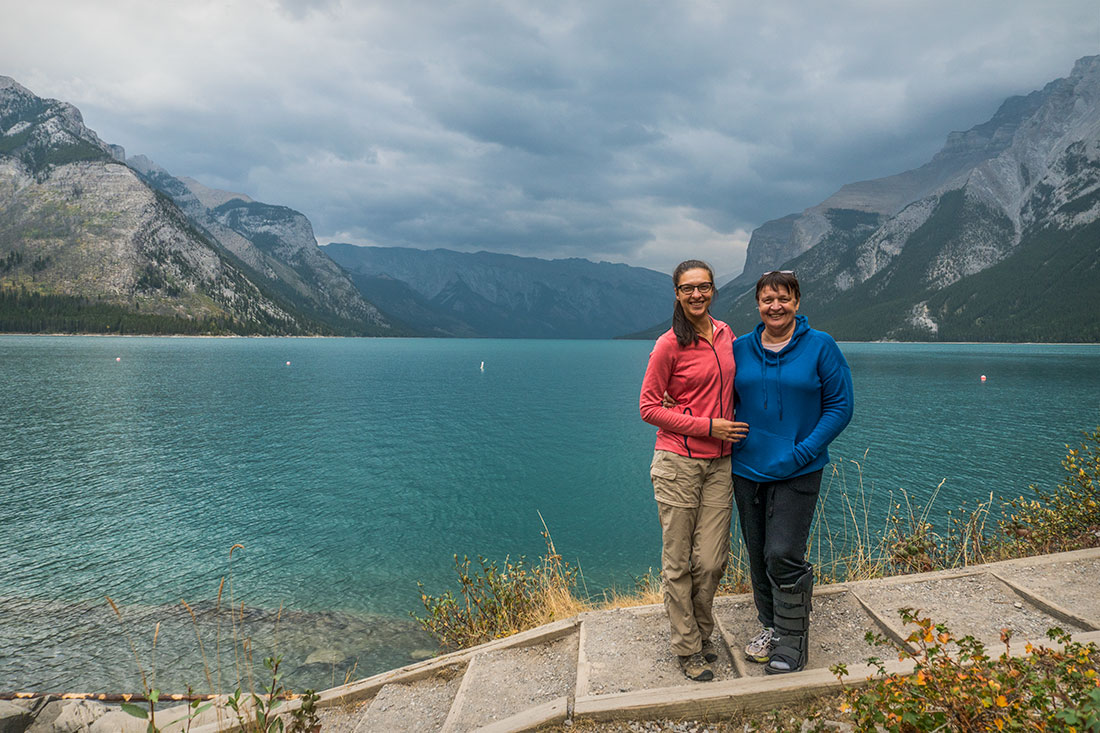


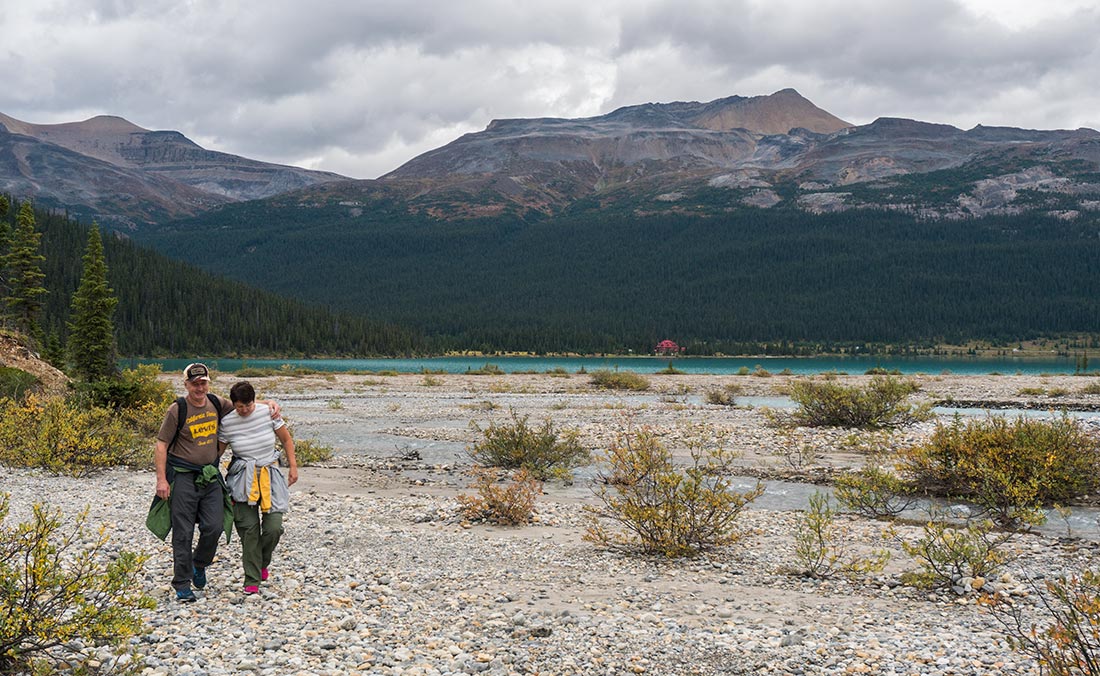


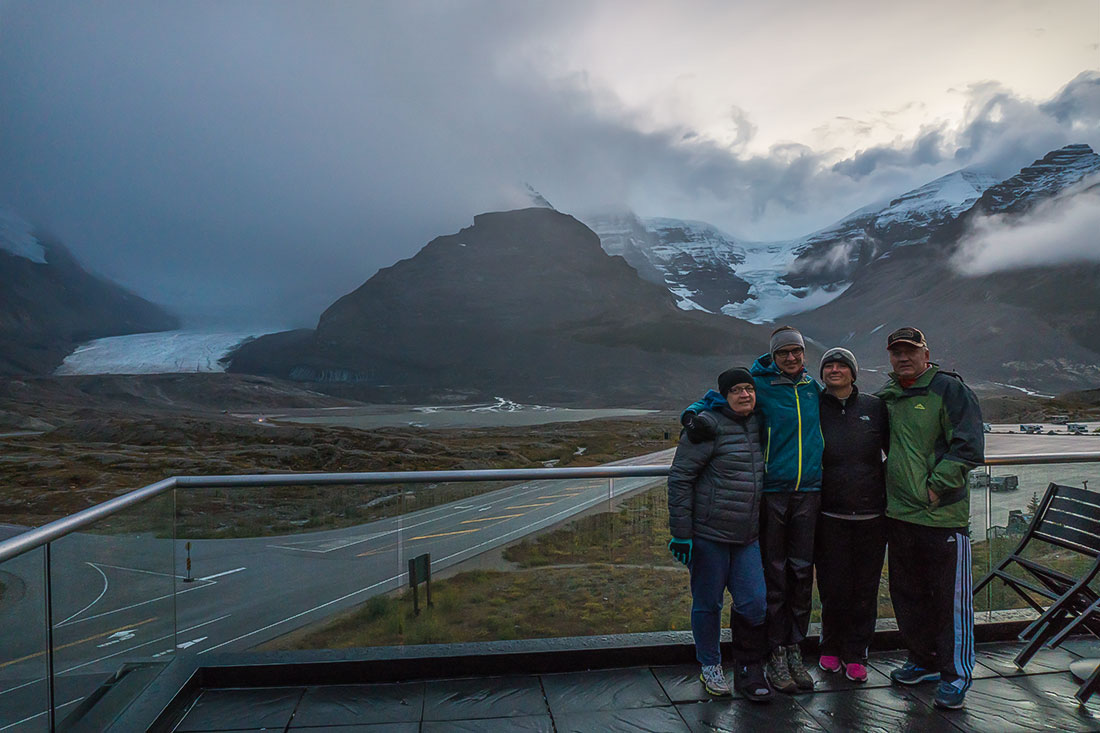
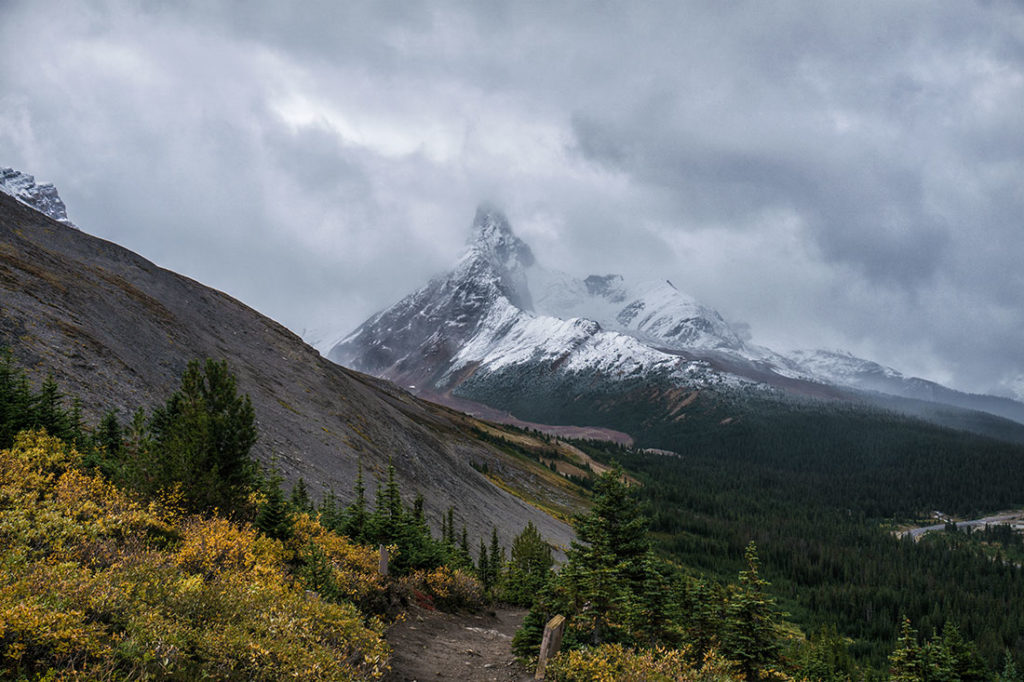


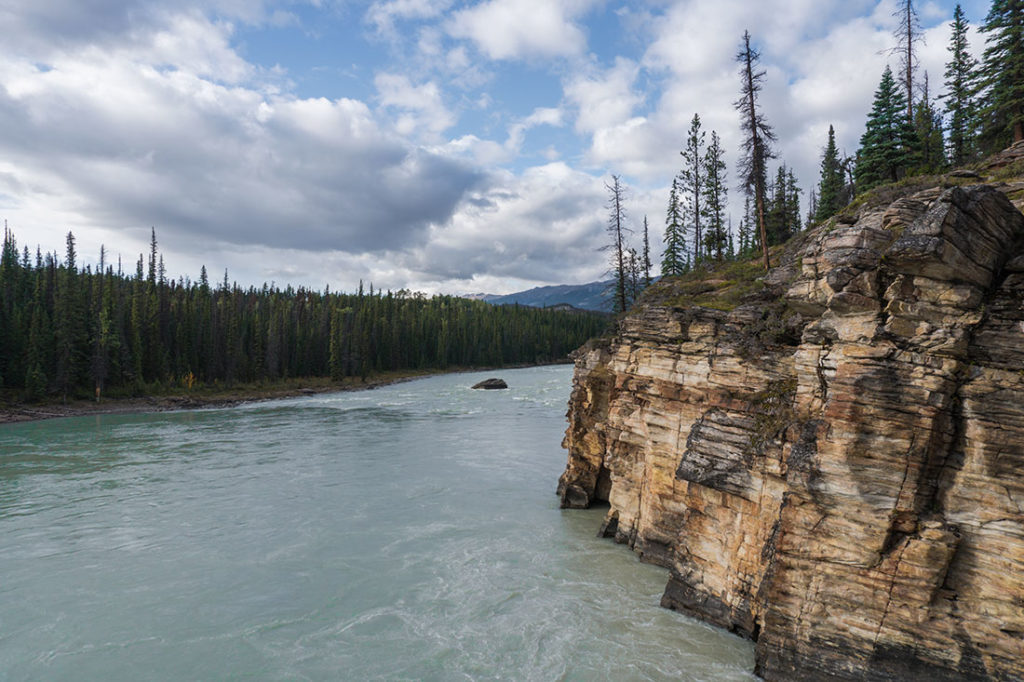


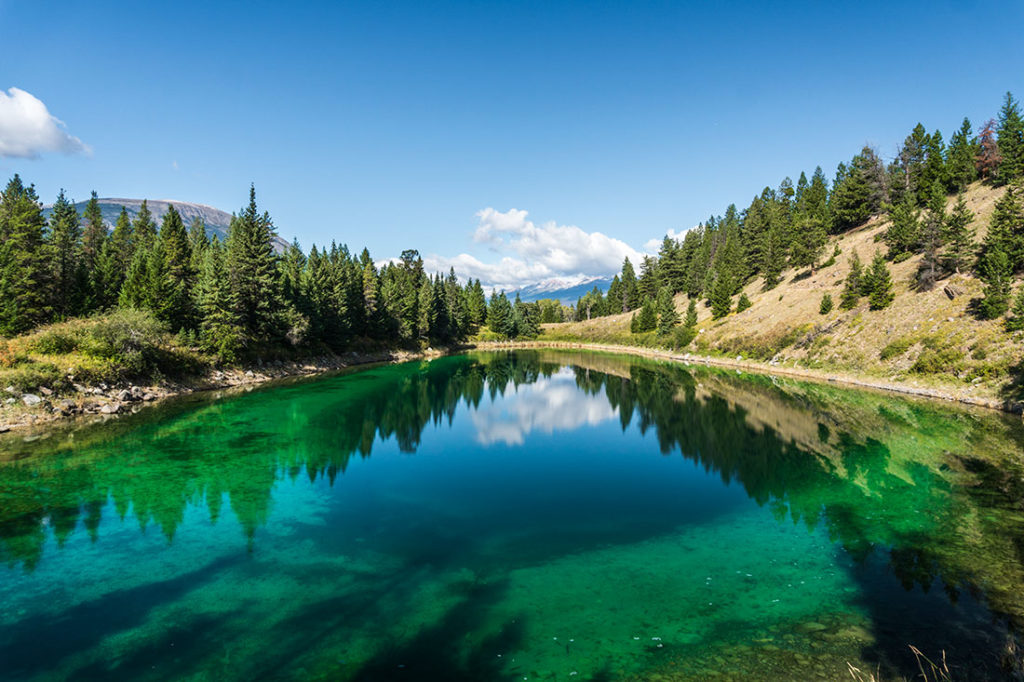


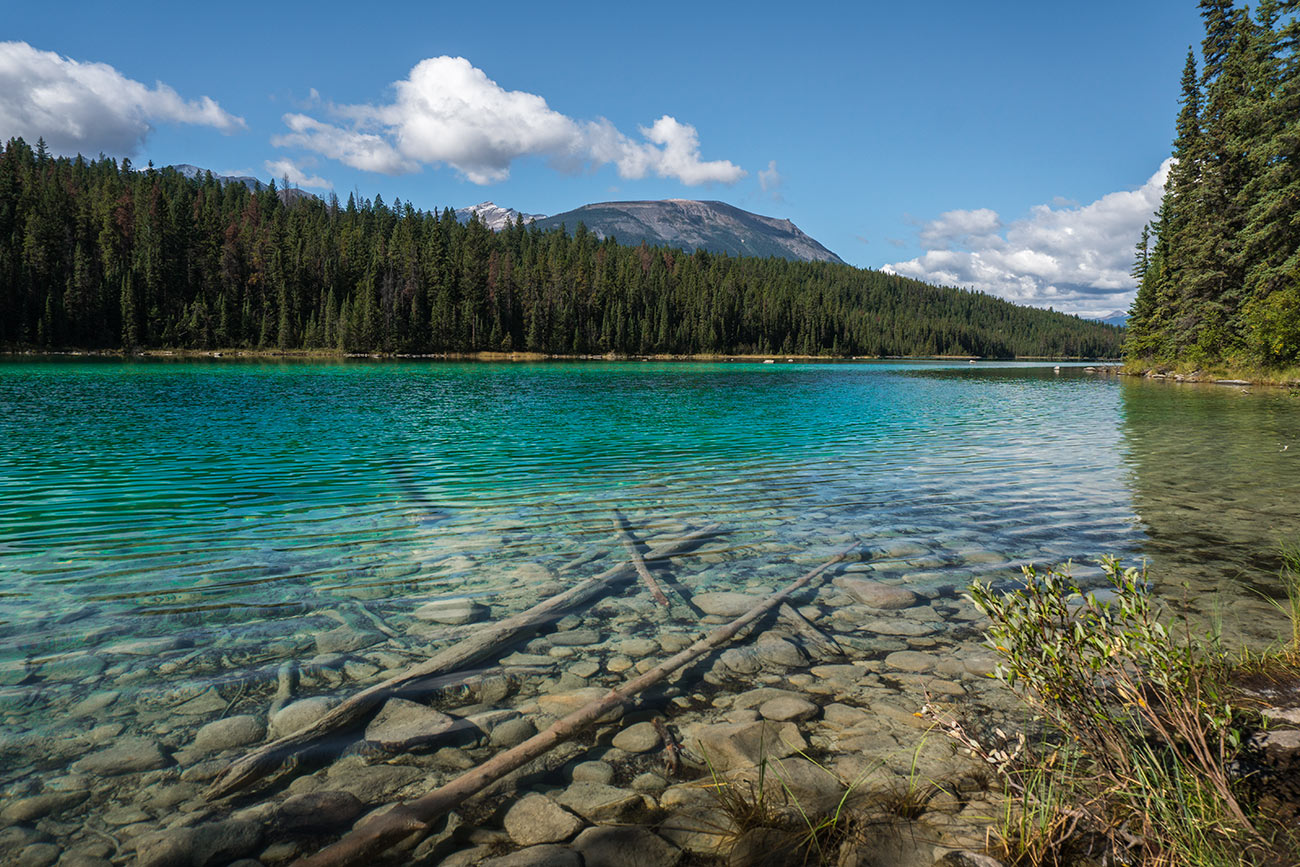
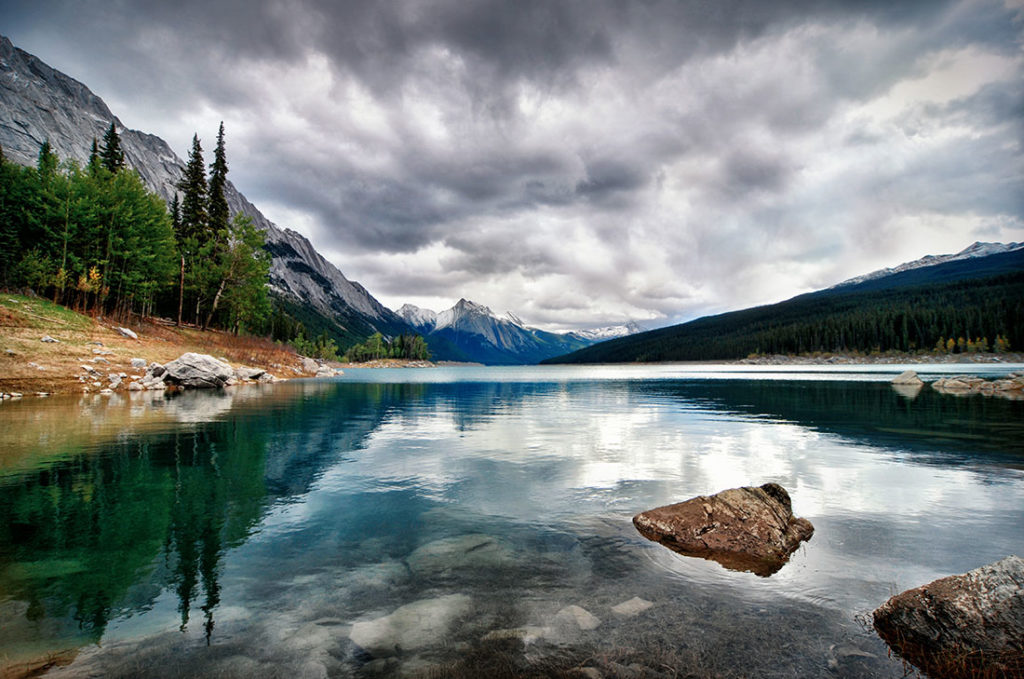

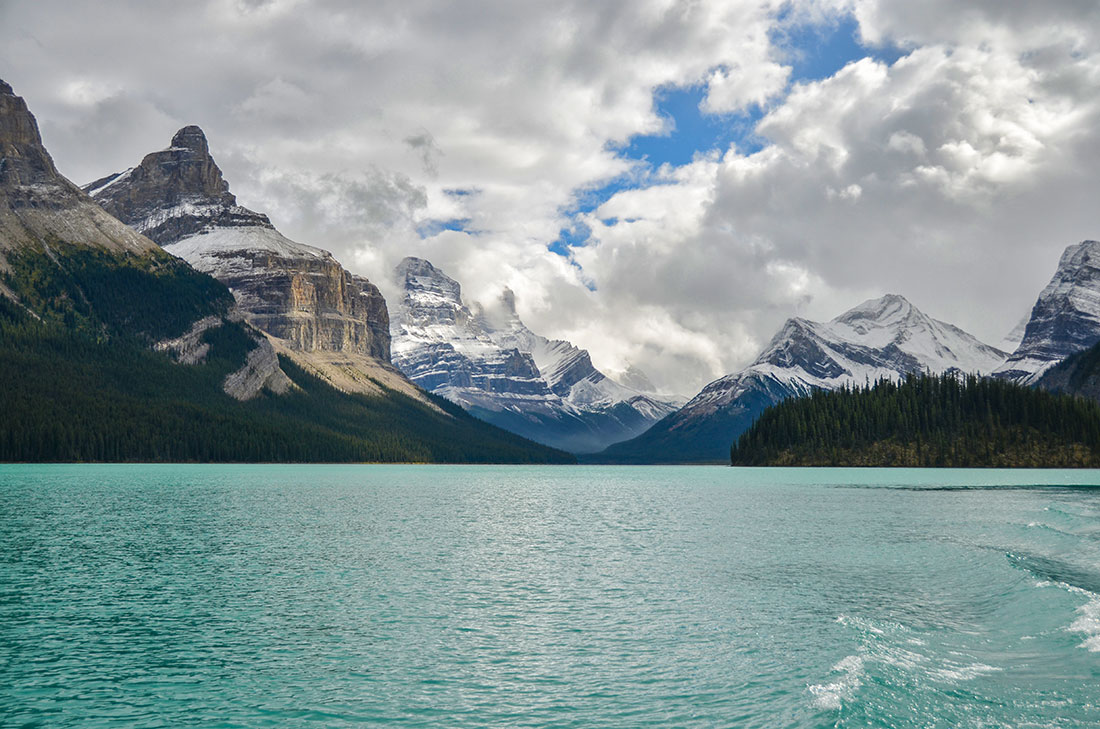


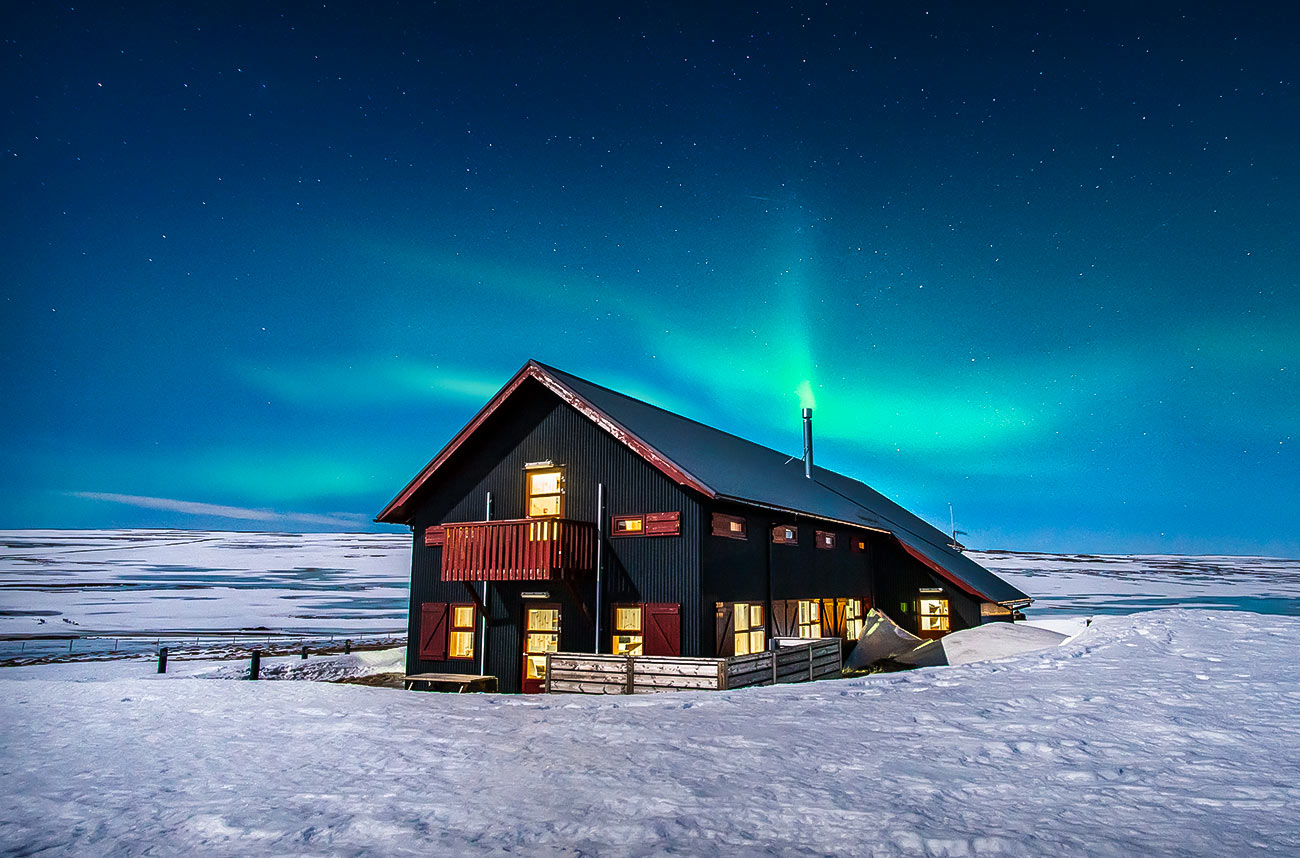
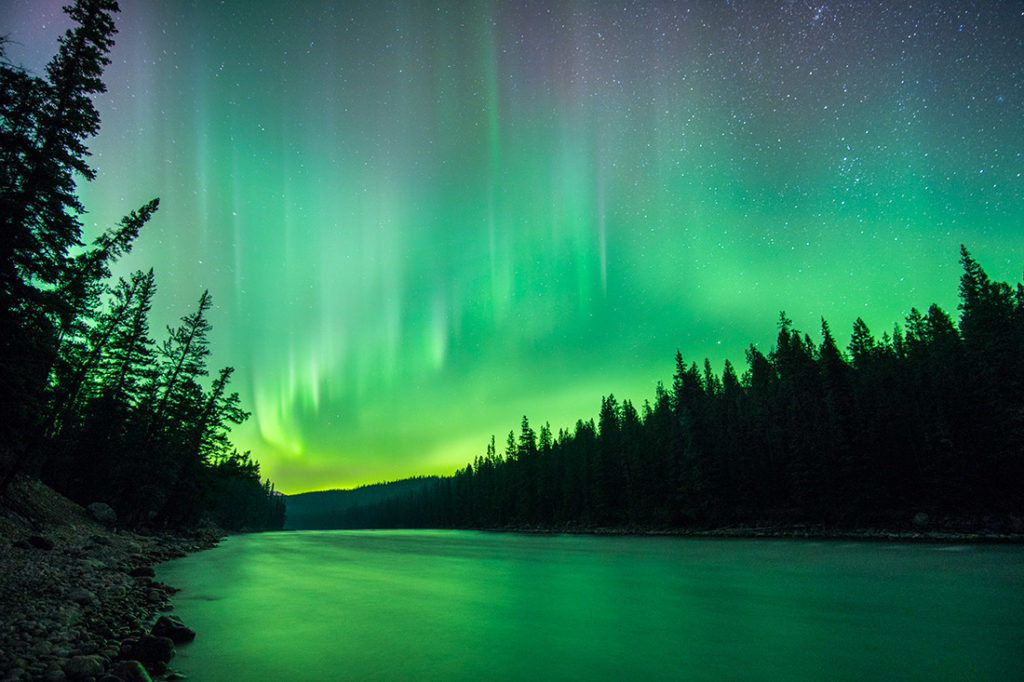 Later that day, we drove around some of the lakes to the east of Jasper, trying to find a good place to catch trout. Unfortunately my dad brought all the wrong fishing equipment and caught nothing 🙂 It got pretty cold toward the evening, and my wife and I became a little concerned. We bought -6C (20F) sleeping bags for our parents, but the temperature was supposed to drop below -4C (24F) so I immediately knew that tonight won’t be a comfortable night. We made our parents to put on every single bits of available clothing and tucked them tight in their sleeping bags in their tents. But before we did that, at one point I noticed a lot of light shining behind some of the mountains and automatically thought that the full moon was rising. After careful examination I realized that it was The Northern Lights slowly appearing in the skies! We all felt blessed and joyfully watched one of the most spectacular shows of our lives!
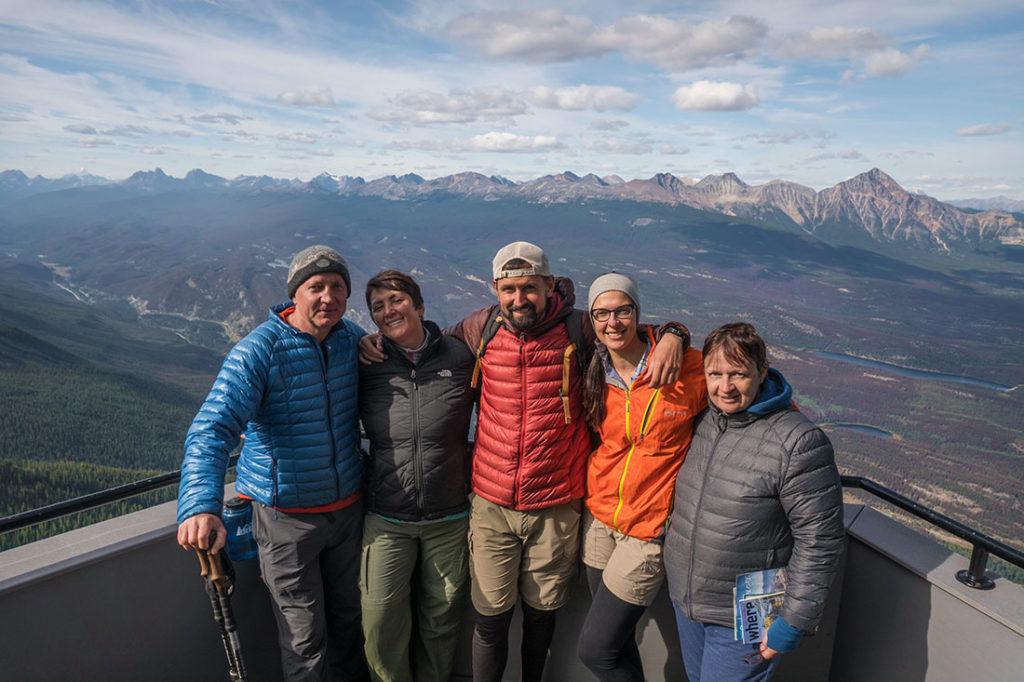


